Scene Panel
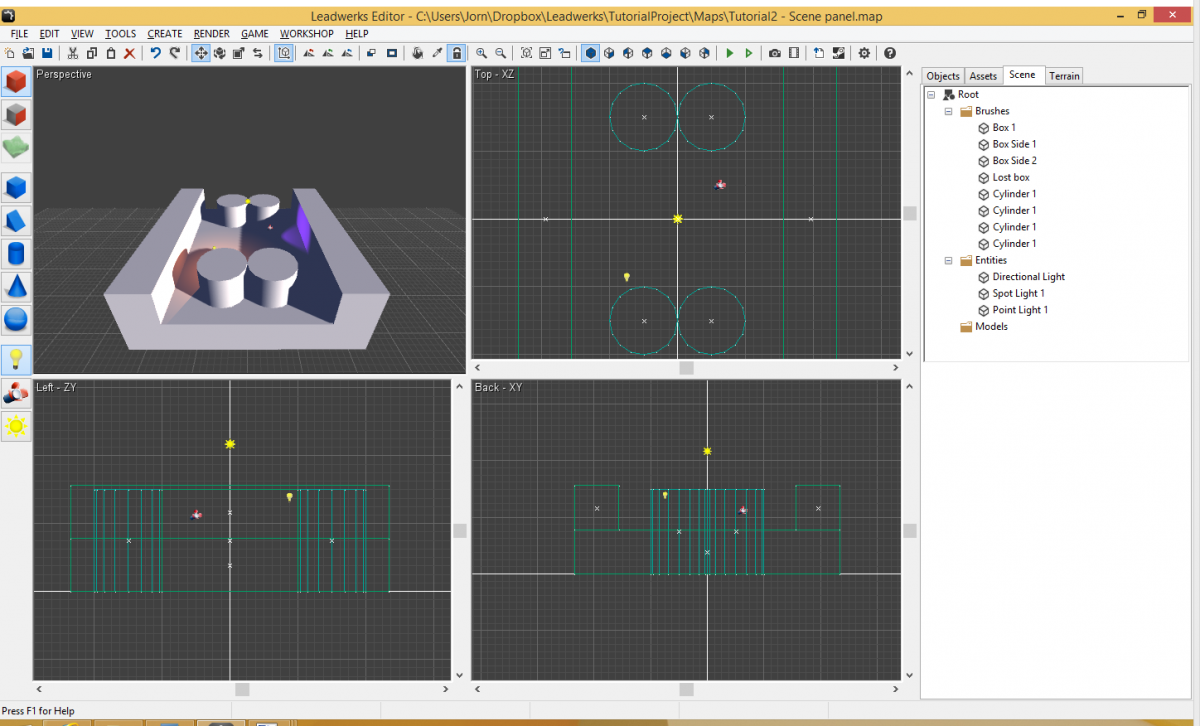
To view all objects that you have in your current scene, click on the Scene tab in the side panel, on the right side of the main window.
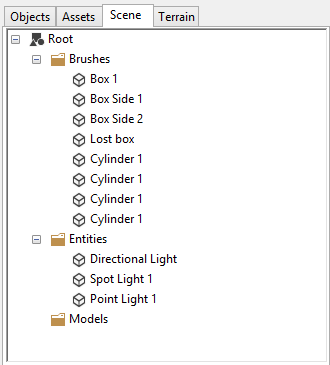
Scene Editor
The top part of the scene panel displays a hierarchy containing all the objects in the map. The first object in the scene tab is called the ‘Root’. Everything that is created in your scene will be a child of this object. Right below the Root filter are three filters, Brushes, Entities and Models. Filters are used to organize your scene into logical parts. Keep in mind that these are not actual folders in your project, but just a visual way to categorize objects. The filters you see in the scene tree are there by default when you create a new scene. They can be removed or renamed if desired.Filters
The scene that we have opened contains three lights which are categorized under the ‘Entities’ filter. We can organize the scene further by putting all lights into a new filter called ‘Lights’. Right-click on the "Entities" filter and select the Create Filter popup menu item. This creates a new sub-filter. Enter the name ‘Lights’ and press the OK button to se the new filter's name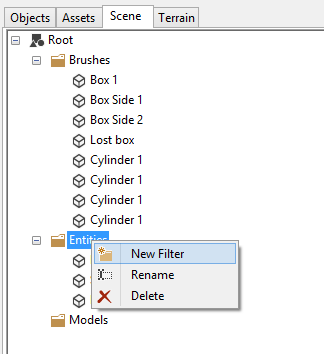
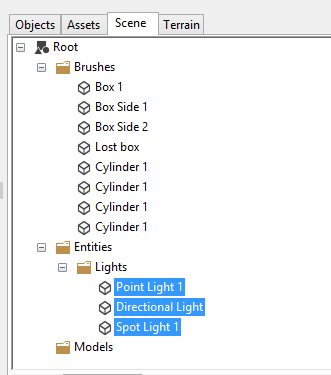
Now go the "Entities" filter and select all lights. We can do this by holding down the control key while left-clicking on each light. Once we have selected all the lights, hold down the left mouse button and drag the items to the newly created "Lights" filter. Let go of the left mouse button. Now all our lights are organized under the "Lights" filter. Good job!
Selecting and Finding Objects
The scene we currently have isn’t a very big one. As a matter of fact, we can see all objects in the scene when looking through the perspective viewport. However, at a certain point in development, you might have a massive landscape filled with hundreds of objects. Finding objects in your scene is a lot easier if you have your scene organized. But even if you have done so, you might not know where certain objects are in your scene.Expand the "Brushes" filter. Notice how one of the brushes under it is called "Floor". Left-click on this object in the scene tree. Notice how the floor object in the viewports is now highlighted in red, indicating it is selected. This makes it easy to tell which object in the map corresponds to which node in the scene tree.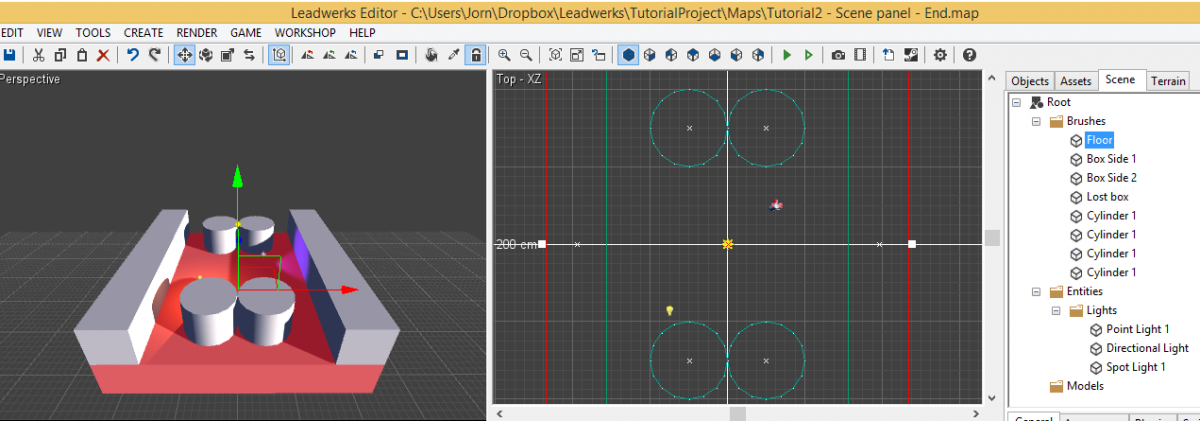
There is another brush called ‘Lost box’. Left-click with your mouse on. Notice how the lost box is not showing up in your viewport? That is because it is placed very far away from the all the other objects in the map. Fortunately, we have an easy way to focus all the viewports on the object we are interested in looking at. Just right-click on that node and select the Go To... popup menu item to instantly travel to that object in all four viewports.

Deleting Objects
When you want to remove items from your scene, there are a few ways to do it. First select the object by clicking on it in any viewport. Go to the ‘lost box’ object and select it. Now that you have selected it in the viewport, it also gets automatically highlighted in the scene tree. Press the Delete key on your keyboard, and the object will be removed from the scene. Whether you have selected the object in the scene tree or in the viewport doesn’t matter. Another option is to right-click on the object in your scene tree and select ‘Remove’ from the popup menu. You can also select the Edit > Delete menu item.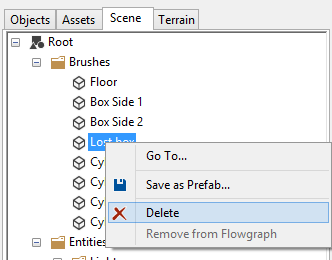
Properties Editor
In the previous tutorial you probably had a glimpse at the properties editor, but now we get to learn some of the cool things you can do with it. Select any brush in the scene, and the properties editor will be display the all the properties of that object.The properties editor always displays at least four tabs displaying the properties all objects share. Some special entities like lights and particle emitters have extra tabs. Those will be covered in other tutorials. For now we will just look at the common properties all objects have.General Properties
Let’s select the "Brick cylinder" brush in the scene by going to the scene tree, then expand the "Brushes" filter and left clicking on object's node. With the Brick cylinder selected the properties editor will appear below. The General tab is selected first by default. The General tab contains the object's name and orientation in space. The values can be changed manually’. If you change the name of the object, its node in the scene tree will be immediately updated with the new name.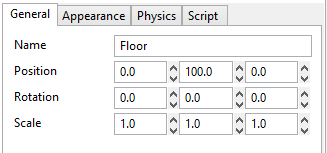
Changing the values for position, rotation, and scale will instantly re-orient the object according to the values you have entered. For example, if you change the first component of the rotation property to 90 degrees and press Enter, you will see that the Brick cylinder is rotated 90 degrees on the X axis.
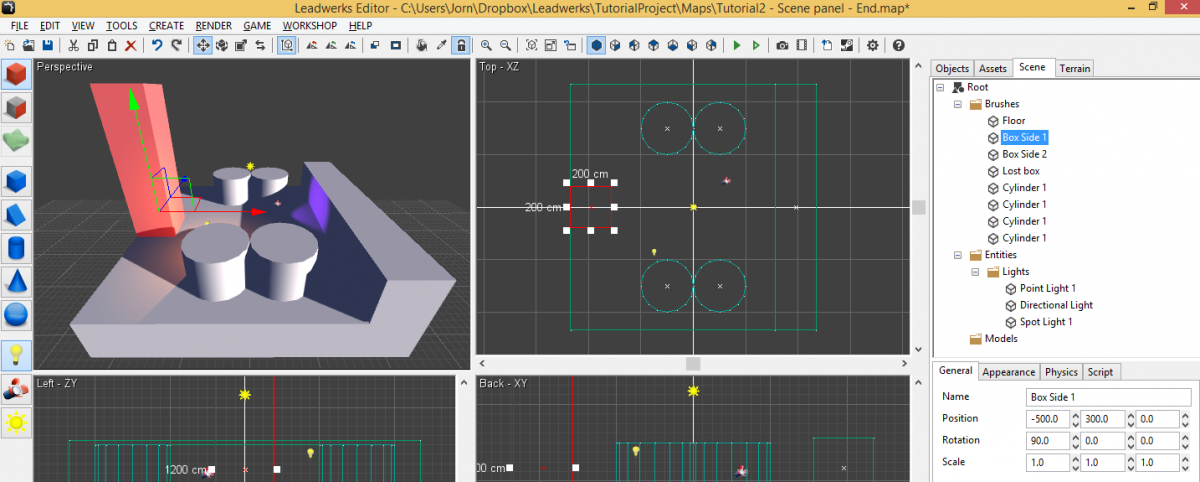
This makes it easy to exercise exact control over every aspect of your map, and gives you instant visual feedback.
Appearance Properties
Make sure the object 'Box Side 1' is still selected. Next click on the appearance tab. The Appearance tab contains properties that affect how an object looks.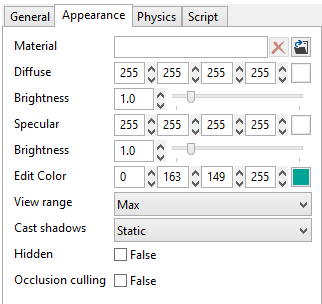
There's a lot of options here! Let's review them all breifly:
- Material: The material the entity uses.
- Diffuse: The diffuse color that is blended with the material.
- Brightness: The strength of the diffuse color.
- Specular: The specular color that is blended with the material.
- Brightness: The strength of the diffuse color.
- Edit color: The color used when a viewport is using the wireframe or solid render mode.
- View range: This controls the distance at which an object disappears from view, with the following possible options:
- near
- medium
- far
- max
- infinite
- Cast shadow: Whether the entity should cast a shadow. (We will explain this in more detail in another tutorial.)
- None
- Static
- Dynamic
- Hidden: whether the entity is hidden. A hidden entity is invisible and has no collision.
- Occlusion culling: When checked, occlusion culling will be used on the object individually instead of just on the scene octree. Because the occlusion test itself has a performance cost, this option should generally be left to its default state. Leadwerks will automatically enable individual occlusion culling for lights and animated models, as these objects tend to be fairly expensive to render.
Physics Properties
Make sure the 'Box side 1' brush is still selected. Now click on the Physics tab. The physics tab contains properties that control how an object physically interacts with the world around it.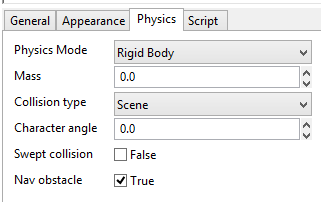
- Physics mode: There are two main types of physics objects in Leadwerks. Rigid bodies are solid objects that can fall, hit, bounce, and roll. Character controllers use a special physics system designed specifically for player controls.
- Mass: This is weight of the object. If set to zero, the object is considered to have infinite mass, and will not be movable by physics forces or collisions.
- Collision type: The collision type determines the physical reaction of your object when it hits others objects. Available types include the following:
- None
- Prop
- Scene
- Character
- Trigger
- Debris
- Projectile
- Character angle: If your character model is rotated the wrong way, this property can be used to turn your character in the right direction.
- Swept collision: Use this checkbox for small or thin objects that require very accurate collision detection. It requires more CPU power so don't use this for every object.
- Nav obstacle: When checked, the object will be taken into account when a navigation mesh is built for AI.
Script Properties
The Script tab contains a property for the Lua script attached to an object, if one is present. We will cover this in more detail in the tutorial series on Lua scripting.
Scene Properties
The scene settings are always present in every single scene. These are global settings that can have a big effect on your map's look and behaviour. To access the scene settings, select the 'Root' element. All scene settings will now be visible.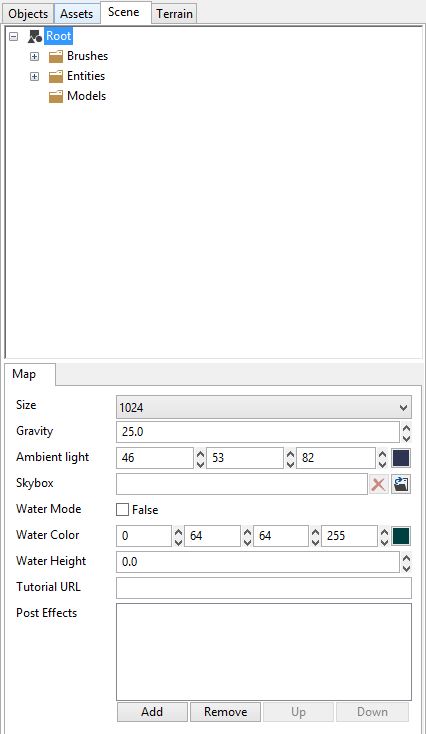
Let's review all the available options.
- Size: The maximum size of the map. Only make the map as big as you really need.
- Gravity: The gravitation force being used in the game.
- Ambient light: The ambient light is a minimum lightness used. Outdoor scenes should have a fairly bright ambient light value. Use completely black ambient light level for a dramatic visual effect.
- Skybox: You can use a cubemap to render a background for the entire scene.
- Water mode: When checked, a water plane will appear everywhere in the scene.
- Water color: This is the color of the water, if it is visible.
- Water height: This is the height of the water plane, if it is visible.
- Post effects: Post-processing effects are rendering effects we can add to tweak the appearance of a map. For example, we can add an effect that makes the scene appear black and white, or another that makes lights appear more bright and vivid. Post effects can even be stacked in order to achieve different appearances.