Models and Animation

Models are also used for objects that move around in the scene, like characters, weapons, and vehicles. Models have special features that allow them to play pre-made animations that make characters react in the game. In this lesson we'll learn all about models and how to make them do what you want.To get started with this tutorial, download this zip file and extract its contents to your desktop:
Importing Models
Just like textures, models are automatically converted and imported when they are placed in a project folder. Leadwerks imports models from the .FBX format which is a standard interchange format for models. When imported into the editor, Leadwerks converts these FBX files to the Leadwerks model file format (MDL). If the FBX file is resaved from an external editor, the model gets automatically reloaded in the editor. This lets you work on a model in an external model editor and see your changes in Leadwerks immediately each time you save.Import Menu
There are a few way we can import models into Leadwerks. In the asset browser, right-click on the "Models" folder and select the Create Folder popup menu. Name this new folder "Machinery". Now select the File > Import menu item in the main menu. Browse to your computer's desktop where you extracted the zip file. Open the "Machinery" folder and select the “controller.fbx” file. Press the Open button to import this file. A new model will appear immediately in the asset browser.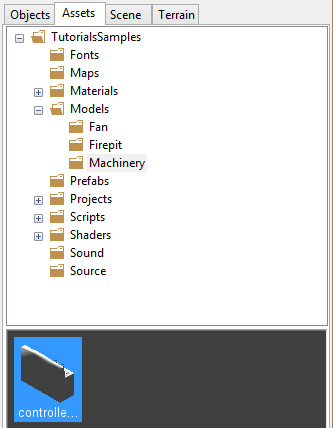
Drag and Drop
You can also drag a model file onto the editor main window. Make sure that the Models folder is still selected and create a new folder called “Oilbarrel”. Now browse to your desktop and open the "Oilbarrel" folder. Select the three files "Barrel.fbx", "barrel_dif.bmp", and "barrel_dot2.bmp". Drag these files onto the editor window and release the mouse button. All files will now be copied into the current project directory and automatically converted. (Note this is not supported in the Linux operating system.)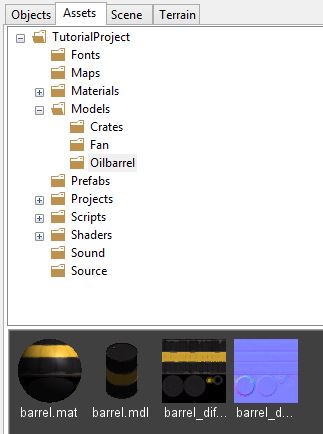
Notice how the oilbarrel already has the texture applied to it. This is because the texture information of the model is stored inside the original FBX file. The FBX file knows the names of the textures to be applied to the model. Leadwerks automatically checks if there are any textures in the same folder and matches those with the information stored in the model. When there is a match, a material is automatically created. The material is also automatically attached to the model. This is one of those little things that just makes life easier.
Copy Files
Finally, we can just copy the files to be imported into our project folder. Browse to your desktop and copy the “Torch and Sconce” folder. In the asset browser, right-click on the "Models" folder and select the Open Folder popup menu item. Paste the copied folder into the models folder here.When we go back to the editor, we will see that the new folder has appeared in the "Models" folder. If we select the new "Torch and Sconce" folder we can see that thumbnails for the model and textures appear, and that a new material file has been automatically created. This makes it very easy to get 3D models into Leadwerks quickly.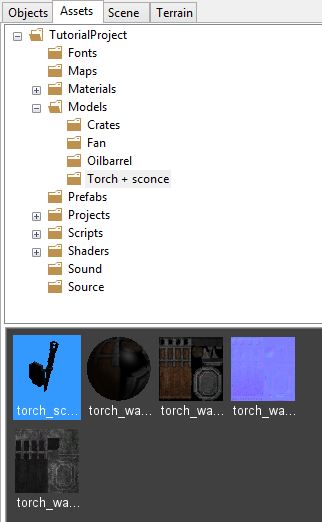
Model Editor
Now that we have imported several models, we are going to take a closer look at those models with the Model Editor. Navigate to the "Oilbarrel" folder in the asset browser. Double-click on "barrel.mdl" file in the asset browser. The model will now be opened in the model editor. To the left you see the model hierarchy. On the right you can see a 3D preview of the model.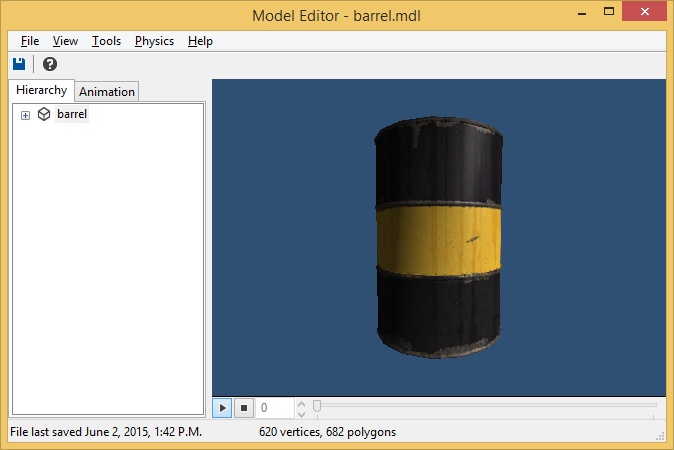
Just like with the material editor you can zoom in and out by holding down the right mouse button and dragging the mouse up and down. You can rotate the camera by holding down the left mouse button in the preview panel and moving the mouse around. You can pan the camera by holding down the middle mouse button (mouse wheel) and moving the mouse in any direction.
Models and Materials
Double click on the barrel model to open it up in the model editor. We can see in the model hierarchy that the barrel model consists of a single limb and has no children. If you expand the root limb (the node that says "barrel" you will see that it contains a single surface. Each limb in a model can contain any number of surfaces. A surface is a group of vertices and triangles that can be painted with a single material. Since the original FBX file had the barrel texture associated with it, the material has already been applied.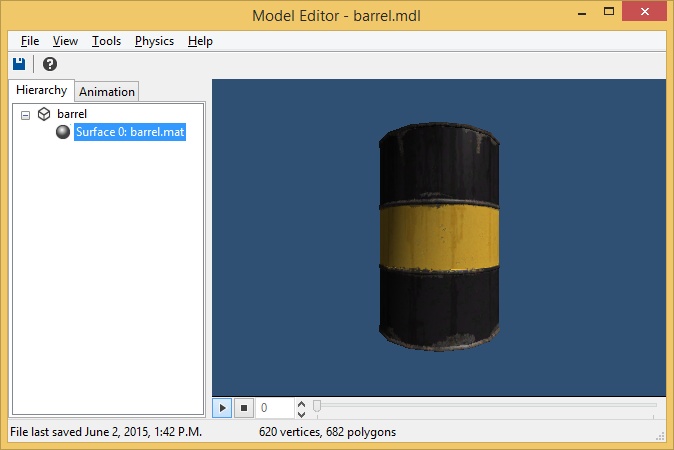
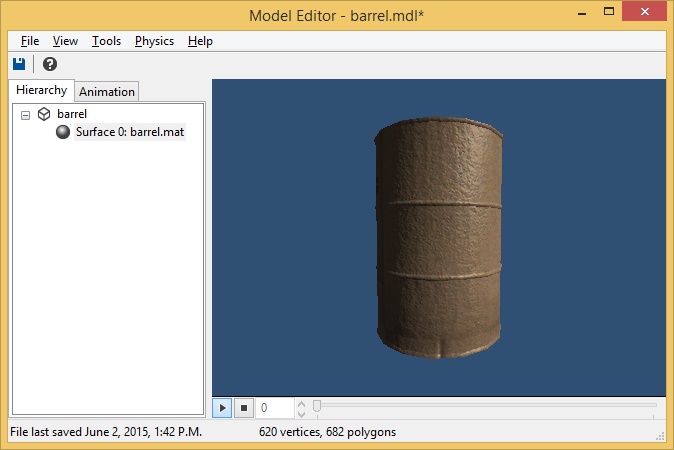
Right-click on the "barrel" limb and select the Select Material popup menu item. This will let you select a new material for the surface. Navigate to the “Models\Crates” folder and select the "cardboardbox.mat" material. Press the Open button and the new material will appear on the model. If we were to save the model, this material would be used any time we created an instance of the model in our map...so let's not do that! Close the model editor window now, and when prompted to save changes, press the No button.
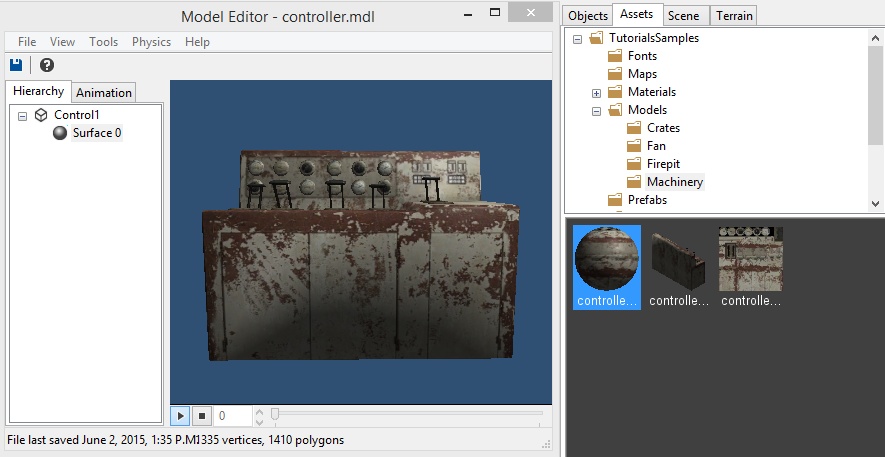
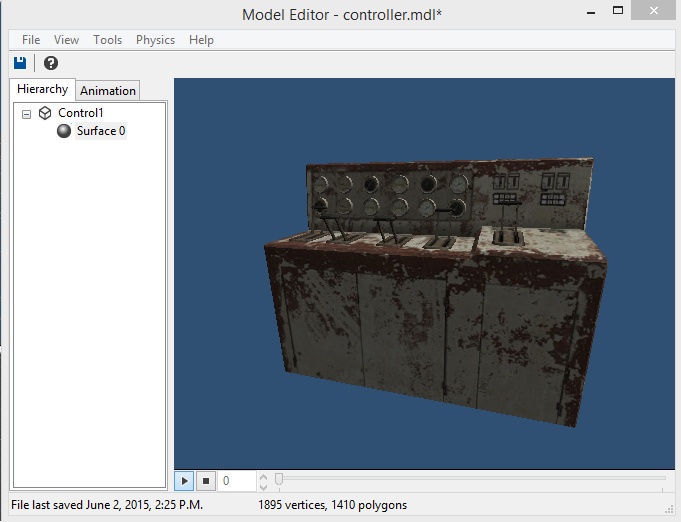
We can also drag material directly onto models to apply them. Open the "Machinery\controller.mdl" file in the model editor. Remember how the model didn’t have any textures visible? We need to import the texture first, create a material for it, and then we will apply that to the model. First we need to import the texture. Browse to the “Material1” folder on your desktop where you extracted the ZIP file. Select the "controller_diff.bmp" file in there and drag it onto the main editor window. Make sure you have the “Machinery” folder selected in the asset browser so it gets copied there. Once the texture is imported, right-click on its thumbnail and select the Generate Material popup menu item. Now click and drag the newly created fan material into the model editor and drop it on top of the model in the 3D view. The model now has the correct material and is no longer gray. Save your changes by selecting the File > Save menu item in the model editor menu. Once you save the file, the thumbnail in the asset browser will be updated to show the material.
Normals
Normals are a vertex property that indicates which direction a vertex points. As we saw with smooth groups, normals can be used to make surfaces that appear rounded or sharp. Sometimes models contain bad normal data, which can make them appear strange. You might have noticed that the lighting on the controller model we've been using looks a little funny. The object appears rounded where it shouldn't be. This is because it has bad normal data that doesn't match the shape we actually want the model to represent.These kinds of problems are easy to fix in Leadwerks with the built-in normals calculation tool. Select the Tools > Calculate Normals menu item in the model editor menu. A new window will appear with a few different options. Select the "Angular Threshold" method and set the angular tolerance value to 35.0. Press the Apply button to fix the model's normals.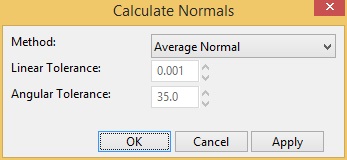
That's much better! Notice how the edges look nice and sharp? Make sure to save your changes before closing the model editor window.
Resizing
Leadwerks uses a scale that considers one unit space to be equal to one meter. Sometimes models are created at different scales, like one unit equals one centimeter. You can rescale models each time you place them in the editor, but it's easier to resize and save them in the model editor. To resize a model, select the Tools > Resize menu item in the model editor menu. The Resize Model dialog will appear.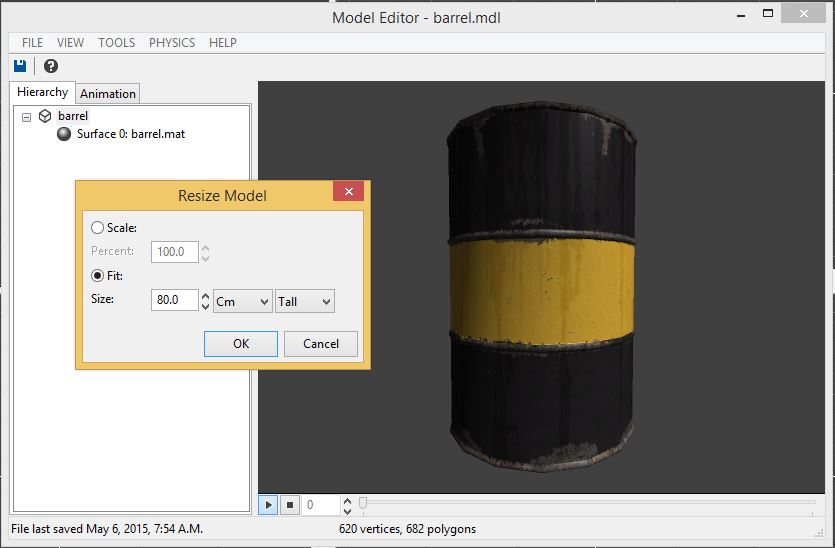
You can scale the model by a specified percentage, or you can fit one axis of the model to a real-world measurement. For example, you can resize a character to be exactly six feet tall, without knowing the exact starting size of the model.When you're done adjusting the size of a model, select the File > Save menu item to save your changes.
Collision
To be physically interactive in the world, models require a physics shape. Physics shapes are normally a simplified approximation of the model geometry. This helps the physics calculations to run faster. In Leadwerks we have built-in tools that make it easy to define a physics shape for any model. We can also model a physics shape by hand in an external modeling program.Shape Tools
Open the file "Models\Fan\fan.mdl" in the model editor. Click on the View menu in the model editor menu and make sure the Show Physics menu is checked.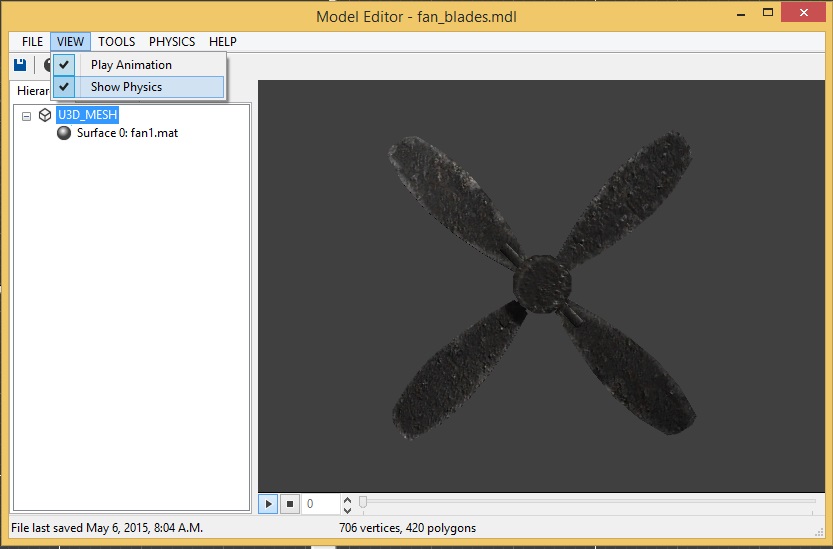
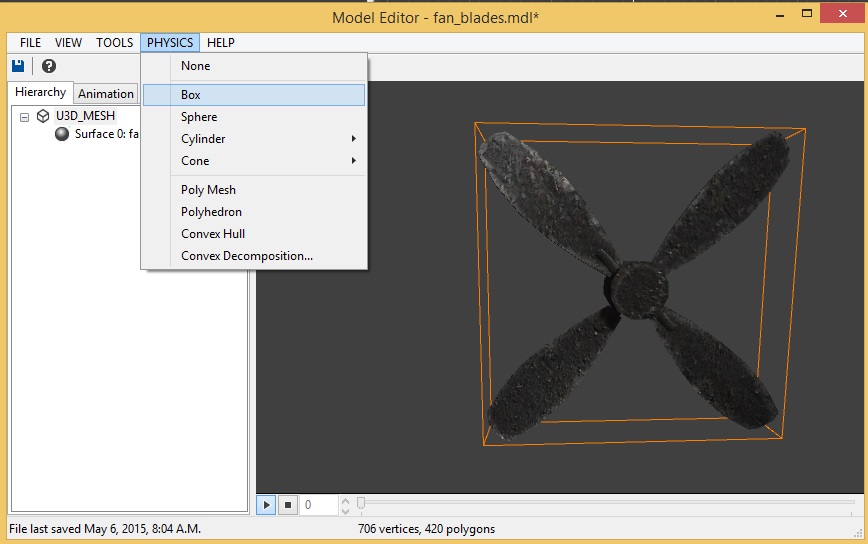
This will display the physics shape of a model with a wireframe outline. If no physics shape has been defined, no shape will be visible. Now open the Physics menu in the model editor menu. You will see a list of physics shapes you can generate for the model:
- Box: a box surrounding the entire model
- Sphere: a sphere surrounding the entire model
- Cylinder(X): a cylinder surrounding the entire model which lies on the X axis.
- Cylinder(Y): a cylinder surrounding the entire model which lies on the Y axis.
- Cylinder(Z): a cylinder surrounding the entire model which lies on the Z axis.
- Cone(+X): a cone surrounding the entire model which lies on the X axis, pointing in the positive direction.
- Cone(+Y): a cone surrounding the entire model which lies on the Y axis, pointing in the positive direction.
- Cone(+Z): a cone surrounding the entire model which lies on the Z axis, pointing in the positive direction.
- Cone(-X): a cone surrounding the entire model which lies on the X axis, pointing in the negative direction.
- Cone(-Y): a cone surrounding the entire model which lies on the Y axis, pointing in the negative direction.
- Cone(-Z): a cone surrounding the entire model which lies on the Z axis, pointing in the negative direction.
- Polyderon: This mode creates a 24-sided 3D shape and then "shrinks" it around a model's vertices. This is the best option for most models, as it is fairly accurate and produces a low-poly result.
- Poly Mesh: this option creates a polygonal mesh from the existing model. This is usually the best option for buildings where each triangle in the visual geometry should be collidable. However, this shape will not be able to react to physics forces, as it has no defined volume. Any objects that use this mode will be completely immobile in the world, acting as though they have infinite mass, although other objects will be able to run into them.
- Convex Hull: a convex hull is the simplest convex shape that can contain all the vertices of an object. This is a good option for simple shapes, but care should be taken to avoid creating too complex of a physics model with this mode.
- Convex Decomposition: This is an advanced method that creates a series of approximate convex shapes that contain the object. Although convex decomposition does not create an exact shape of the object, it does an excellent job of creating an approximation that is low-poly enough to use in real-time games. When this mode is used, a dialog box appears that contains several options to let you control the accuracy of the results.
For our fan it is important that we consider how the physics should work for it. If the fan was just a background item which only requires that we can’t walk through it, then the Box option will do just fine.
If we wanted to be able to block the fan blade by sticking a smaller object in its path, we need a more detailed shape. Select the Convex Decomposition menu item. This will build an approximate shape out of multiple convex shapes. The shape isn't 100% perfect, but it's pretty close and good enough considering that it will be invisible.
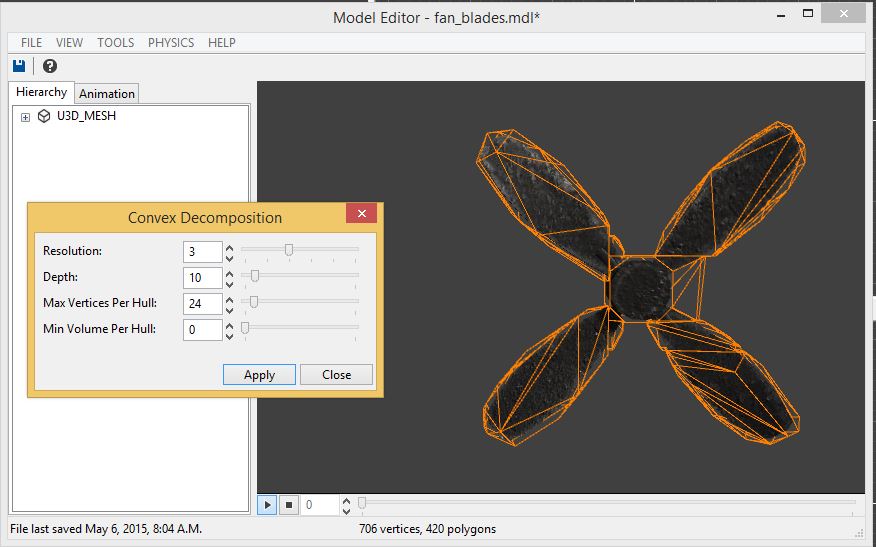
You can adjust the properties in the convex decomposition dialog to get a slightly different result if you wish, but for our purposes this is close enough. Best of all, it only took a few seconds to create.
Modeling Shapes
Sometimes we need finer control over physics shapes. Fortunately, it's easy to build shapes into a model and have them load automatically in Leadwerks. To do this, just add a limb in your modeling program and set the name to "collisionhull". This limb will be turned into a physics shape when the model is loaded.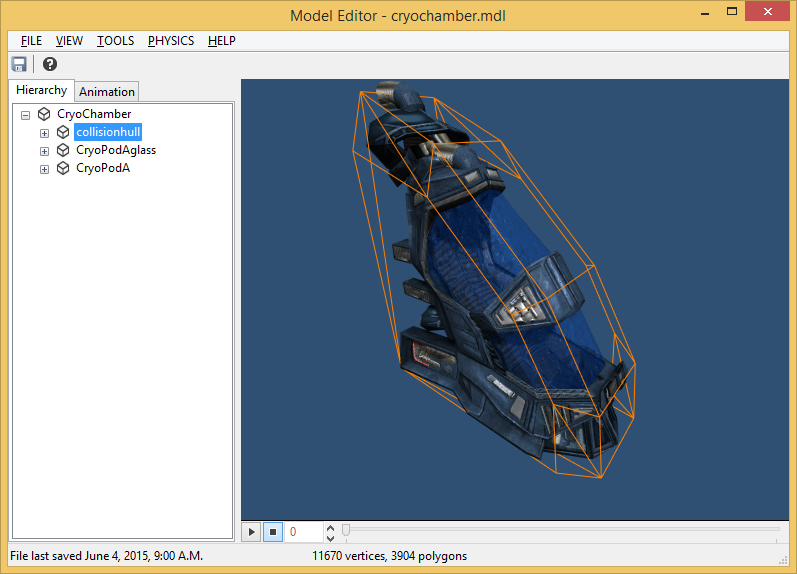
If you want to build a polygonal mesh collision shape, just create a limb in the model named "collisionmesh". Remember, a poly mesh collision shape does not react to physics forces, so this is good for making a low-poly collision shape for a building or other large stationary object.You can also use multiple objects in the model file to build a compound shape made of multiple pieces. If you are making a compound collision shape, it is perfectly okay to name the separate limbs "collisionhull01", "collisionhull02", etc., since Leadwerks just considers the first part of the name.
Animation
Animation is used to make character models perform actions like running, waving, jumping, and sneezing. Animations are created in an external modeling program like 3ds max. Animation is actually the hardest aspect of game artwork to learn how to make, so we usually just rely on pre-made animations. Animations are stored in FBX files and imported with a model.Let’s see what happens when we import an animated model into Leadwerks. Navigate to the "Crawler" folder on your desktop and copy it. Paste the Crawler folder in your game project under the "Models" folder. The model, textures, and material will be imported right away. Now open the "crawler.mdl" file in the model editor. You'll notice right away that the model is moving all by itself. (If it isn't, just press the Play button in the animation controls at the bottom of the window.)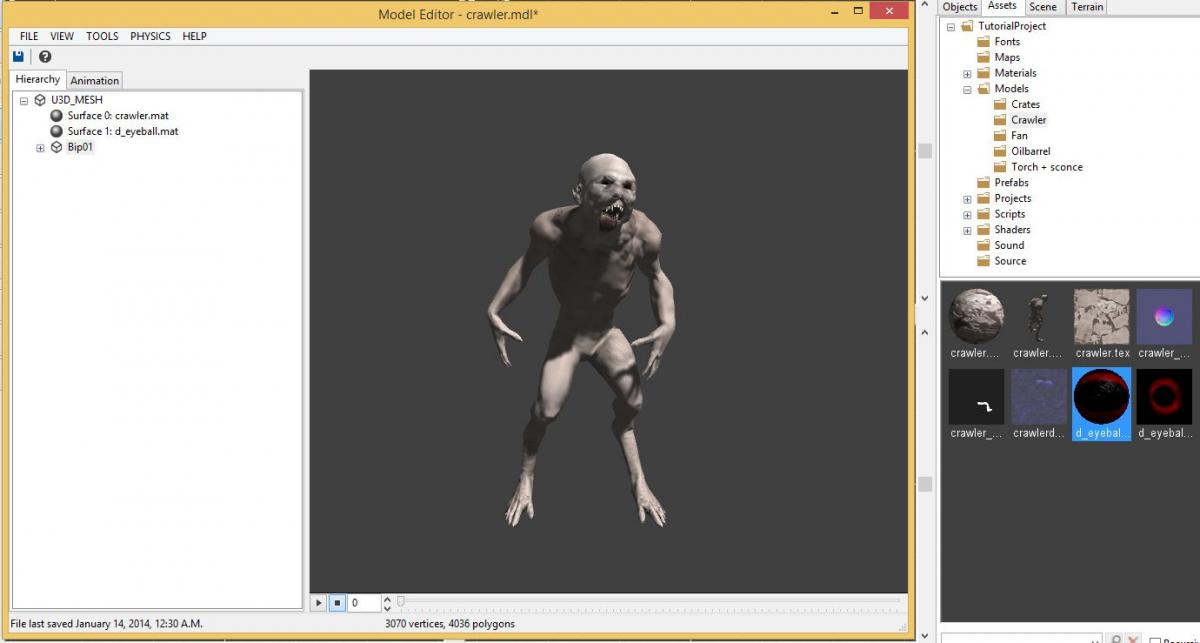
Let’s take a look in the model hierarchy. This has a lot more limbs in the tree than the fan model had. This is because the model contains a large number of bones. Bones are special objects used in 3D software to create animations. The visible surface is "rigged" so that each vertex is attached to one or more bones. When the bones move around, the vertices get stretched along with them, giving the model a realistic organic look. Expand the "Bip01" node in the crawler's hierarchy to see all the bones the model contains.Now select the Animation tab. This model has several different animation sequences already laid out for us. There are different sequence for running, attacking, dying, and "just standing around". This is sometimes called "multi-track animation" because the animations are separated into different sequences.
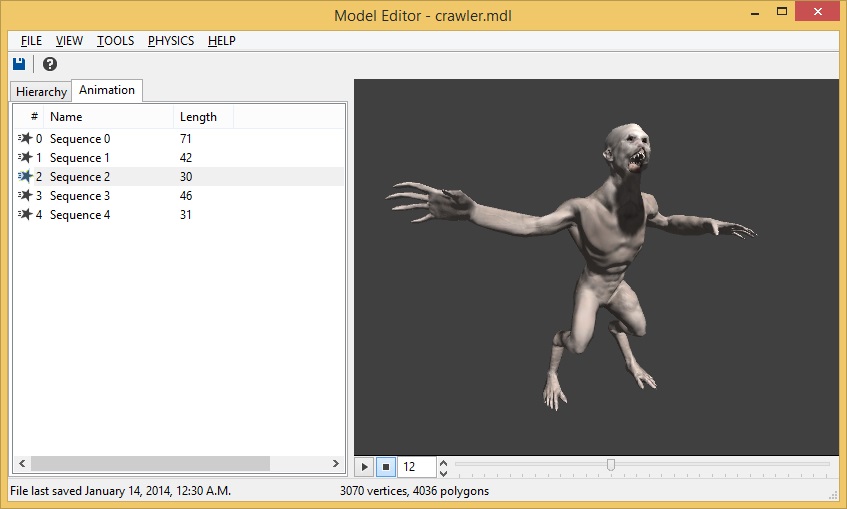
Sometimes a model will have all animations combined into a single sequence. This is sometimes called "single-track animation", and it's not very easy to use. Fortunately, we have built-in tools that can extract an animation sequence from a range of frames in a single-track animated model. Just right-click on the base animation sequence and select the Extract Sequence popup menu item. We can then fill in the range that we want to extract, and a name for the new sequence.
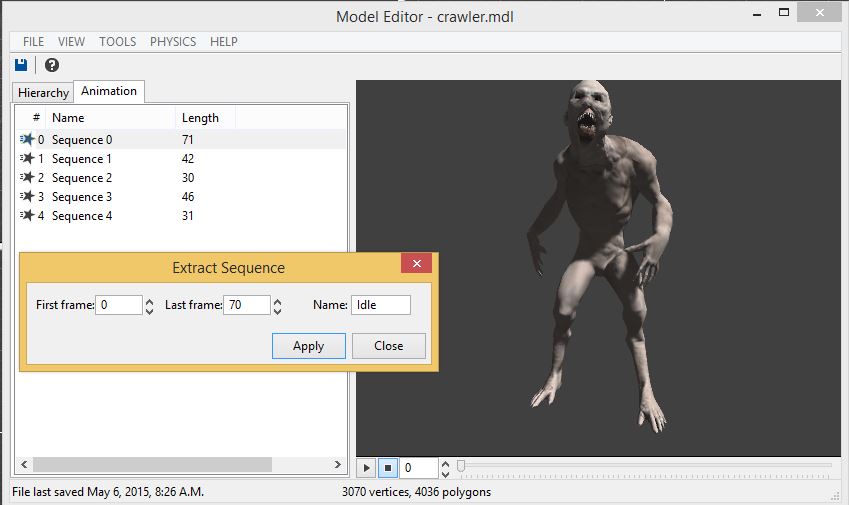
When you press the Apply button a new sequence will be created. When you're done extracting all the animations you want from the original single-track animation you can right-click on it and select the Delete popup menu item to remove the original animation.
Animation Shader
Leadwerks uses hardware-accelerated skinning so that you can have lots of animated characters onscreen at once. This works by animating vertices in the shader. This means that an animated model's material needs to use a special animation shader or animation will not be visible. Most of the time this will be assigned automatically when a material is generated upon model import. However, if you need to manually assign a shader to a material yourself, you can find these shaders in the "Shaders\Model\Animated" folder: The crawler material, for example, uses the shader "diffuse+normal+specular.shader", which can be found in this folder.In order to make the character's shadow affected by animation, the material also needs a special shadow shader. This can be found in the same folder, and is named "shadow+animation.shader".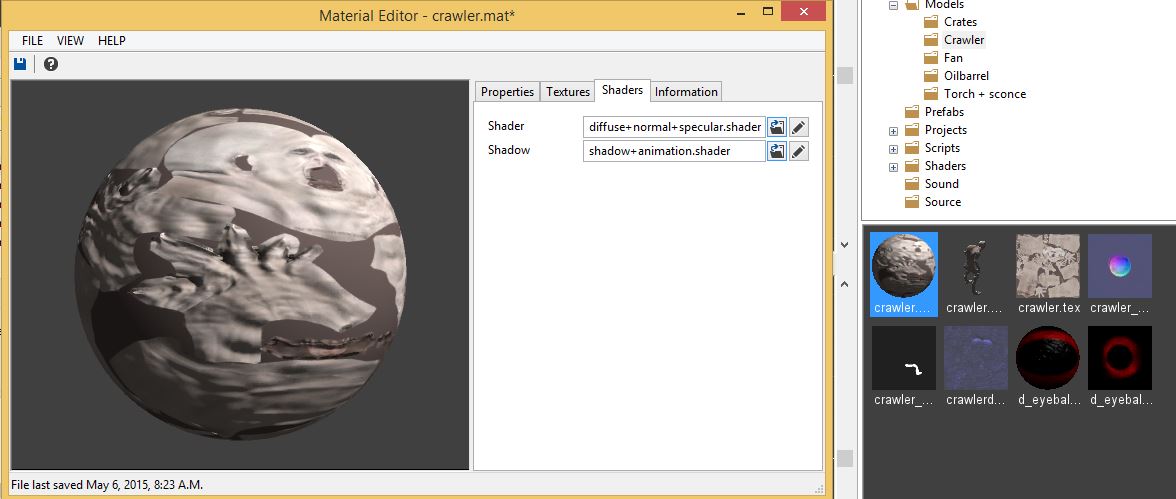
Adding Models to the Scene
To add a model into a scene, click and drag the model file thumbnail from the asset browser into any of the viewports. If you want to see the outline of your model's physics shape, then check the View > Show Physics menu item in the main menu.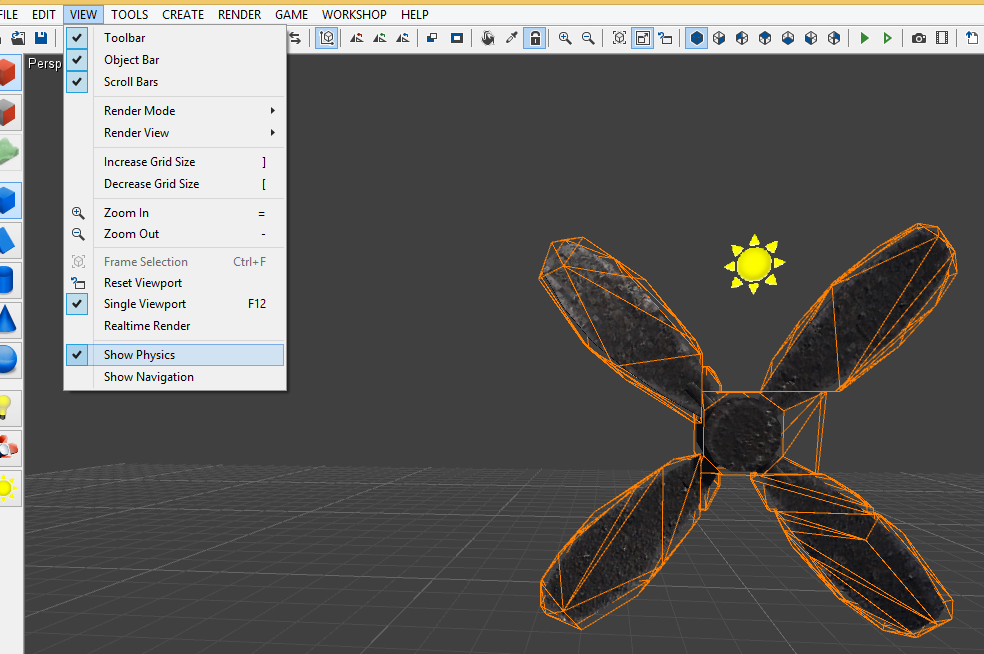
Translate, Rotate and Scale
Just like with brushes we can translate, rotate and scale models...and you will, frequently!
Translate
Select any model in the scene by clicking on it in the perspective viewport. When a model is selected, the surface will be shaded red and a 3D control widget will appear at the object's position. The control widget represents the object's position and orientation in space. The red, green, and blue arrows represent the X, Y, and Z axes, respectively. Each individual arrow can be grabbed and dragged to move the object in the arrow’s direction. The middle area of the widget can also be selected to move the object in two directions at once.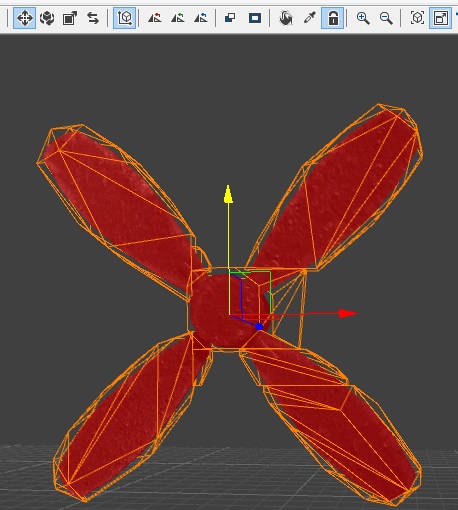
Local and Global Coordinates
When you translate a model, by default it moves in a global coordinate system. This means that however the object is rotated, it always moves in global or world space. You can change the coordinate system from global space to local space by selecting the Edit > Local Coordinates menu item in the main menu. Objects will then move along their own axes when they are translated. If an object has a rotation of (0,0,0) then global and local space are the same for that object.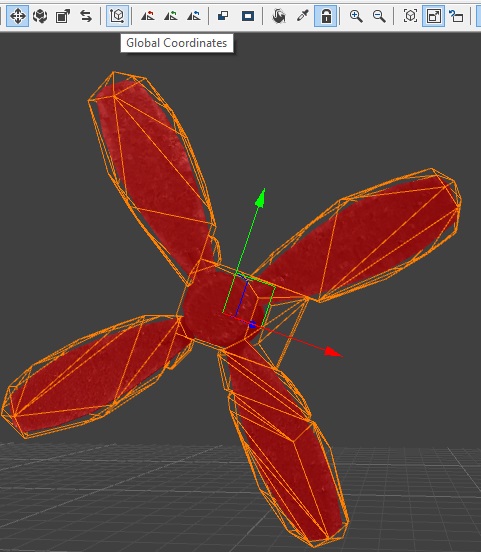
Rotate
Now select the Rotate toolbar button in the main toolbar. Notice how the gizmo in the perspective viewport has changed. Select one of the axes, hold down the left mouse and move the mouse around to rotate the object.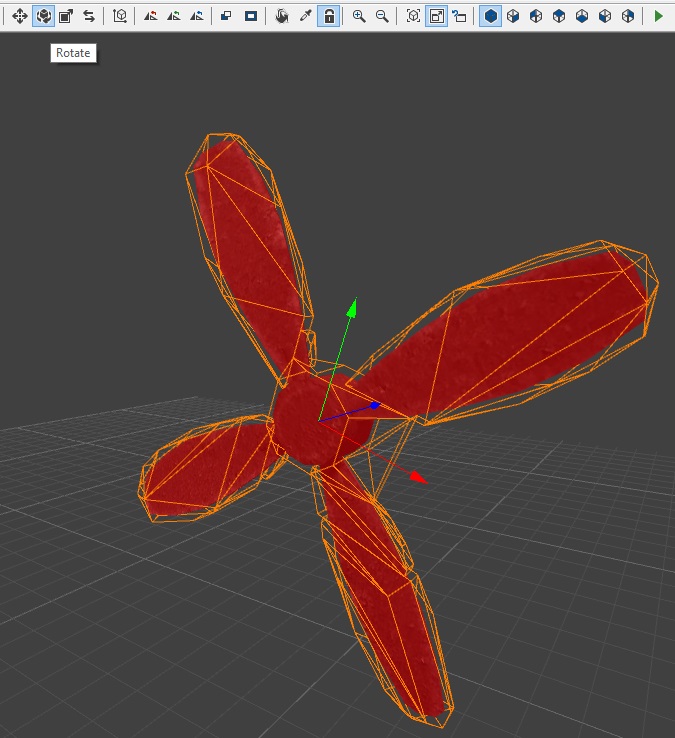
As with brushes, you can use the Rotate X, Y, and Z toolbar buttons to perform a quick 90 degree rotation on any axis.
Scale
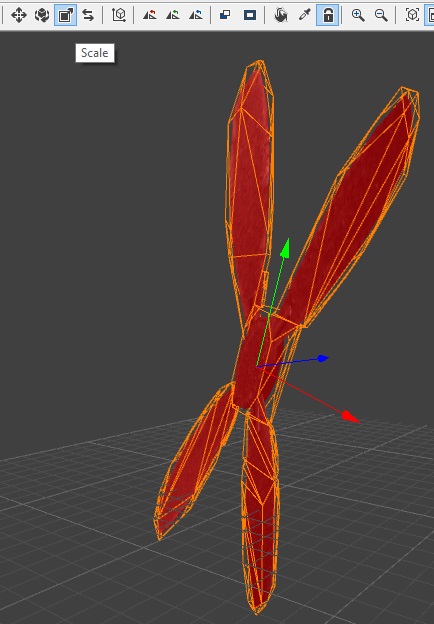
To scale a model, select the Scale toolbar button in the main toolbar. You can now click and drag the object axes to resize it on any axis. You can also edit a model's scale property in the properties editor, under the General properties. This is the easiest way to scale an object to a precise size.