Editor Interface
Hello, and welcome to the first Leadwerks tutorial! This is your first step into the fun and exciting world of game development. In this tutorial series we will take a close look at all the basic things you need to know to work with Leadwerks. We will not cover any gameplay or scripting just yet. We will purely focus on the ins and outs of the awesome game development tool that is Leadwerks Editor, to get you on the way to building your own games
Project Setup
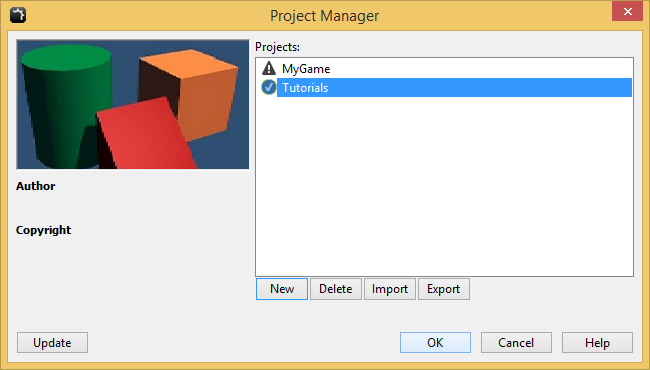
This series of tutorials uses the "Tutorial Samples" project template, which comes with Leadwerks. When you first start Leadwerks, the New Project window will open. If you have already created a project, then select the File > Project Manager menu item in the main menu to open the Project Manager. Press the New button to open the New Project window.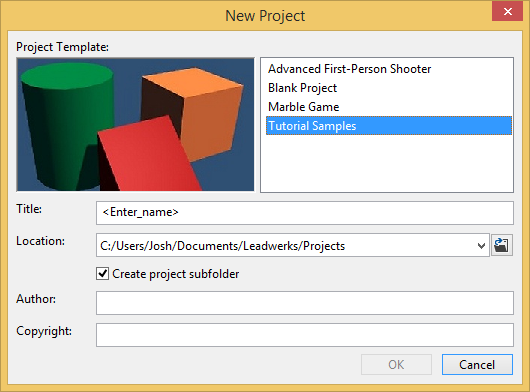 Select the "Tutorial Samples" template, enter a name for your project like "Tutorials", and press the OK button to create your new project. Make sure the new tutorials project is selected in the projects list, then press the OK button to load this project and begin the lessons.
The Editor Layout
When you start Leadwerks Editor, it will look like the image below. The editor has a lot of features available, so let's go over the main ones so you understand what they're for.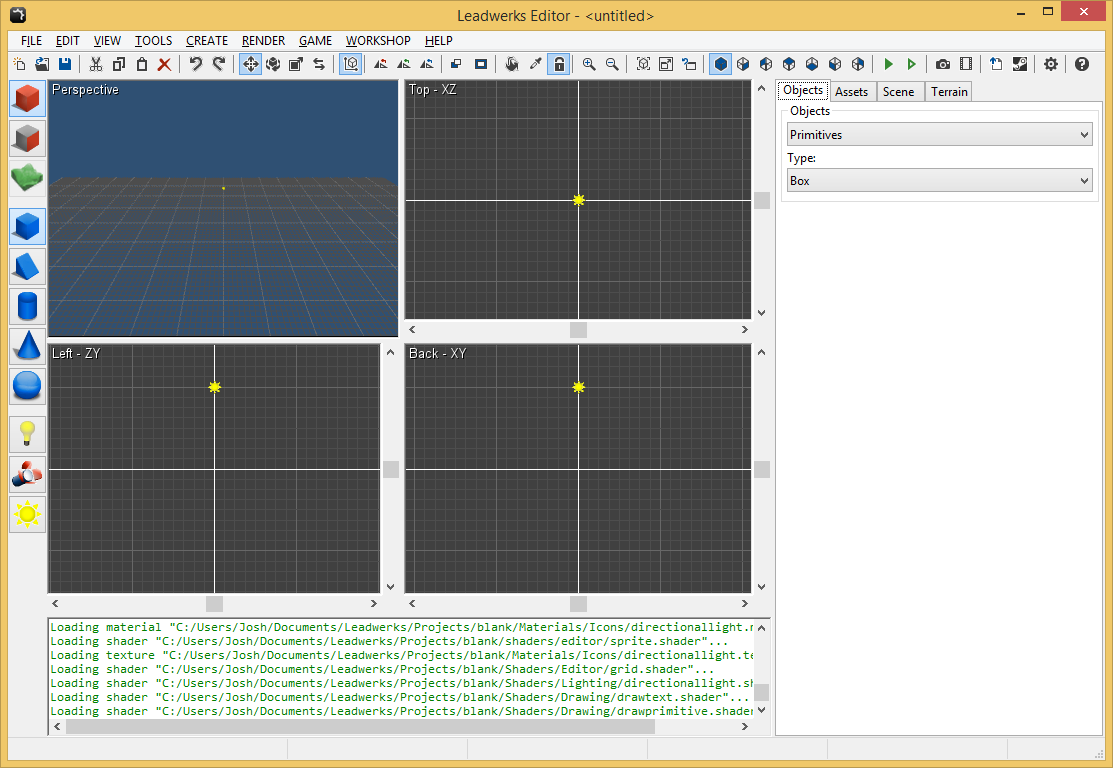
Main Menu
The main menu and toolbar provide access to most of the functions of the editor and lets you open and save files. Many options in the main menu have a shortcut associated with them. We go over all the options throughout this tutorial series.
Main Toolbar
The main toolbar provides quick access to scene functionality, including copy, paste and cut, undo/redo, positioning, rotating, and scaling controls, view zooming and other tools.
Object Bar
The object bar sits on the left-hand side of the main window and provides quick access to common object types and frequently used features. You can set the object selection mode, switch to terrain editing mode, or select an object to create from the most commonly used object types.
Viewports
Viewports are 2D or 3D windows looking into the world you are creating for your game. By default you can see 4 viewports but it is also possible to maximize one of the viewports to fill up the available space and get a closer look at your work.
Console
The console sits in the middle of the window below the viewports and displays text output from the program. If an error is encountered, it will be shown here in bright red.
Side Panel
The side panel sits on the right-hand side of the main window and contains four tabs you can use to show different panels.
Objects Panel
The objects panel lets you select the type of object you want to create and adjust creation parameters for some objects. When using face selection mode, this panel also displays properties for UV mapping and smooth groups
Asset Panel
The assets panel allows you to browse all the asset files in your project. It will show models, textures, materials scripts, shaders, sounds, and fonts.
Scene Panel
The scene panel lets you view all the objects in the scene in a hierarchical tree. It also contains a panel to view and modify the properties of the selected object or objects.
Terrain Panel
The terrain panel contains controls to create and modify terrain.
Viewport Navigation
If you haven’t already done so, open the tutorial project. This part of the tutorial uses a map called "Editor Interface.map" which you can open from the tutorial project. Select the File > Open menu item in the main menu, then select "Editor Interface.map". You can see a simple scene containing a floor and a small box.Most of the area of the application window is covered by four viewports. The viewports are each a window into the game world. Viewports can have their projection mode and view changed, but by default there is one 3D perspective viewport, and three 2D viewports for the top, left, and back views.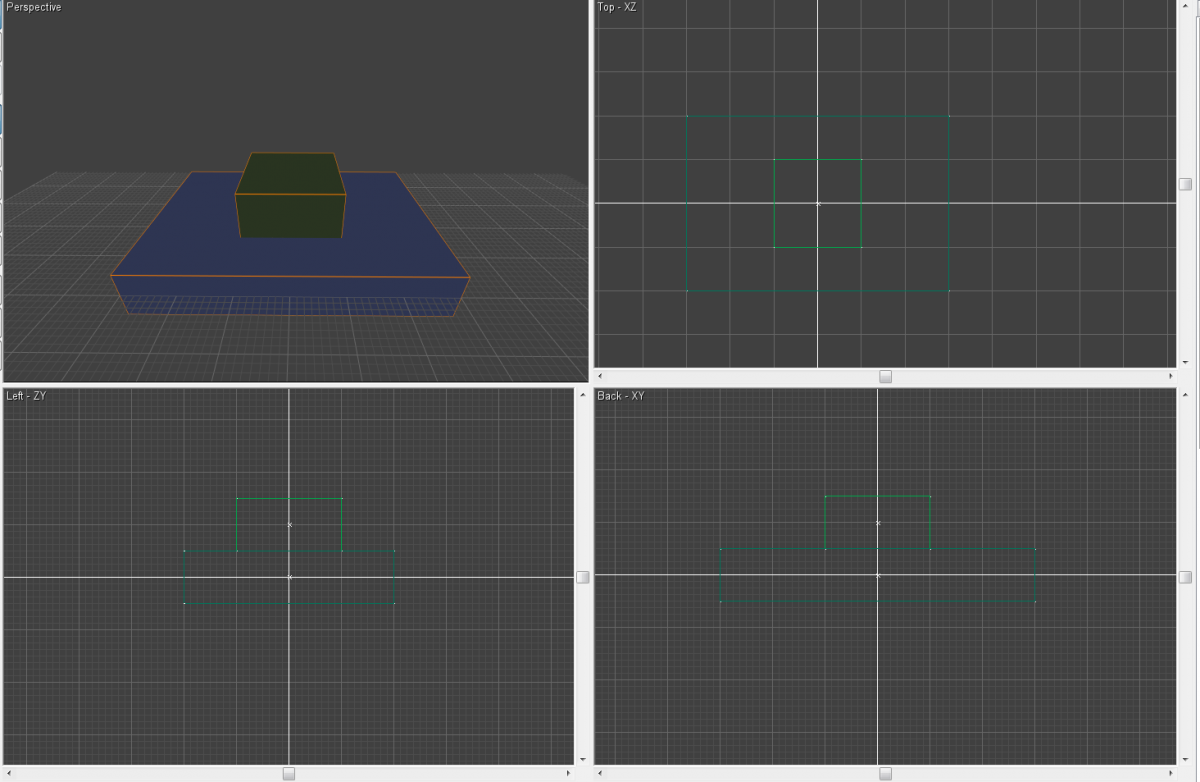 We can also switch to a single viewport. By clicking with the left mouse button in one the viewports, we make it the active viewport. You can switch from four to one viewports by selecting the View > Single Viewport menu item. Selecting the same button again switches back to four viewports. The option to switch between single and four viewports can also be activated with a shortcut: F12.
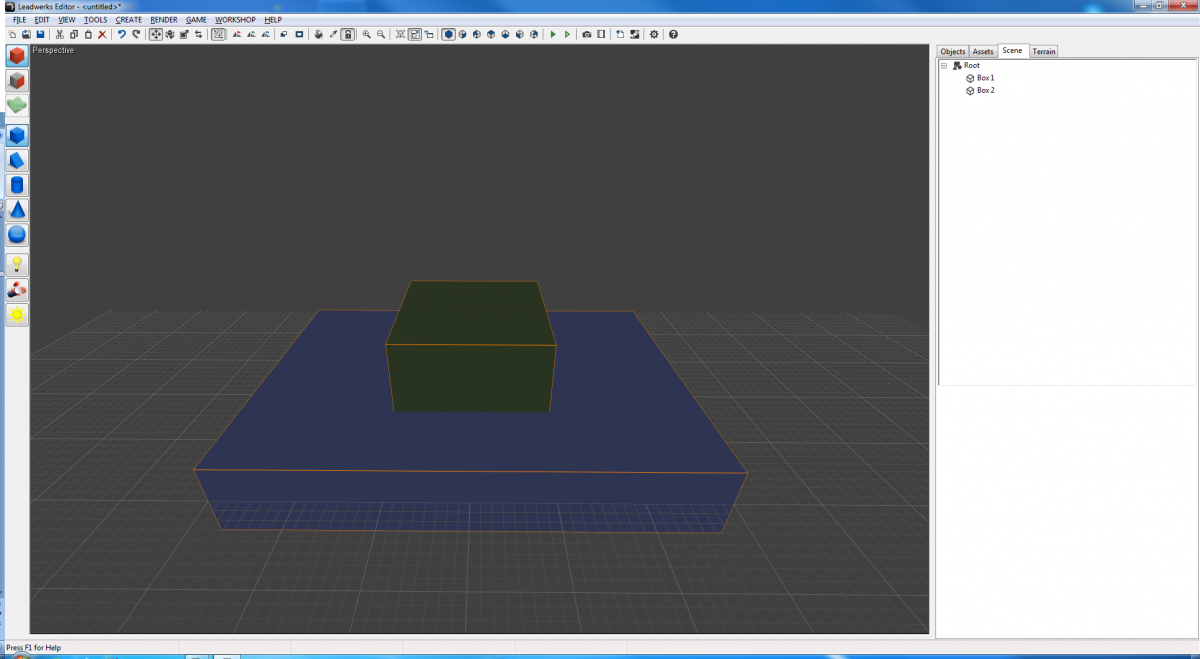 We can also drag the dividers in between the viewports to adjust their size.
Camera Movement
Now let's learn how to move around the scene while looking in the perspective viewport. When you click and hold down the right mouse button in the perspective viewport, you enter free look mode. Move the mouse to look around while holding down the right mouse button. Release the right mouse button to exit free look mode.Now let's move around the scene by pressing the WASD or Arrow keys on the keyboard. You can use these keys in combination with the free look camera to move in the direction that the camera is looking at. The WASD keys will move in the direction you are facing, while the arrow keys will move the camera along a flat plane, ignoring the tilt of the camera. You can also use the E and Q keys to move the camera up and down.Now that we know how to move and look around in the perspective viewport, we will have a look at other viewport navigation options. You can zoom in and out with the mouse wheel or by pressing the + and - keys. In the perspective viewport, this will simply move the camera forwards and backwards.Finally we can pan the camera in all viewports. To do this, click inside the desired viewport area with the middle mouse button (the mouse wheel) on (on PC), or by holding the Control key on Mac and clicking and dragging the mouse button. Alternatively, you can also pan the 2D viewports by adjusting the viewport scrollbars. These can be found on the bottom and right edges of each 2D viewport. When you have a 2D viewport selected, you can also use the Arrow keys to pan up, left, right, and down. If you don't use the scrollbars, you can hide them by unchecking the View > Scrollbars menu item.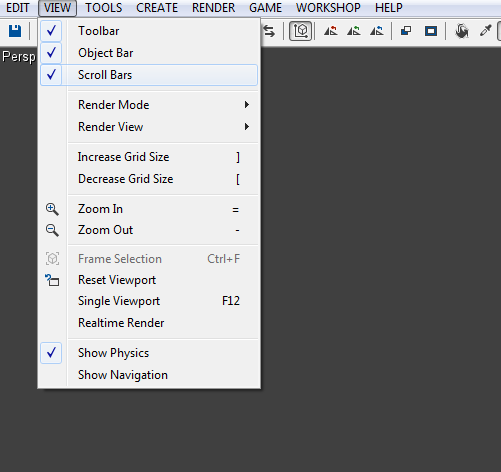
Movement Speed
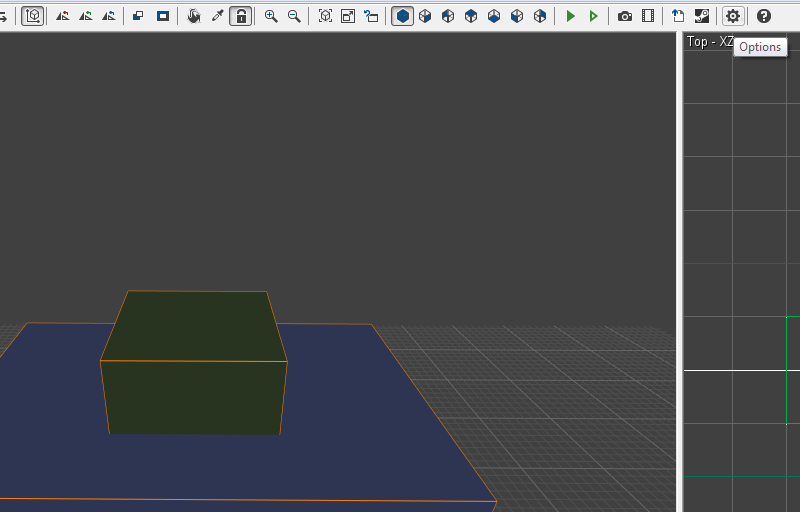
If you want to adjust the speed at which you are moving around in the scene, select the Tools > Options menu item in the main menu. Alternatively, you can also click on the Options toolbar button in the main toolbar.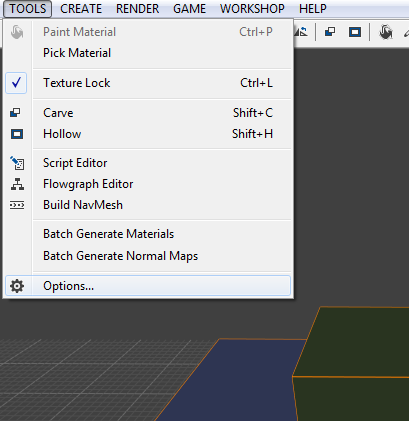
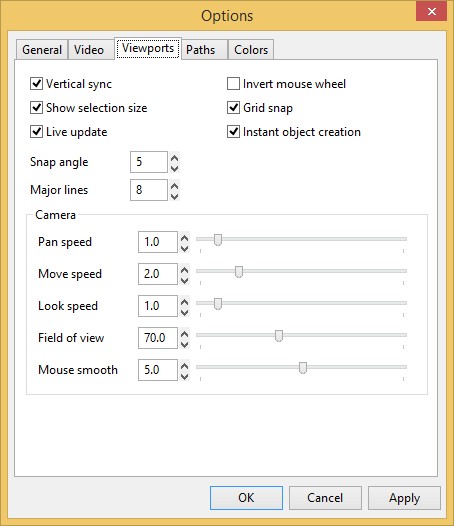
 Here we see the following values that can be adjusted.
- Pan speed
- Move speed
- Look speed
- Field of view
- Mouse smooth
Render and View Modes
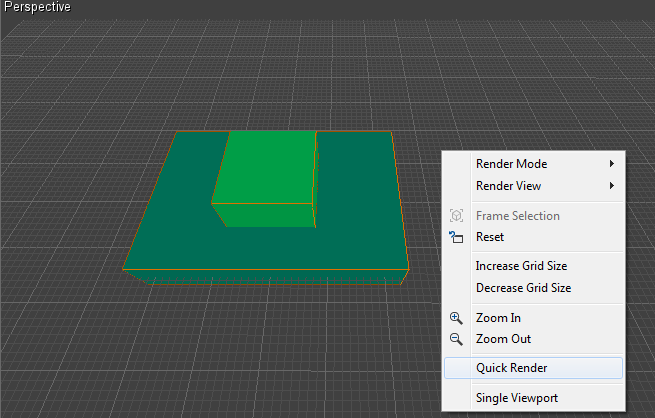
All four viewports have a popup menu you can activate by right-clicking in any viewport. The following menu will appear: Let's try out some of the options. The first option lets you select the render mode. By default the perspective viewport has the option "Textured + lighting" selected, while the other viewports have "Wireframe" selected. Try changing the render mode for the perspective viewport to solid. You will now see the scene without any textures or shadows visible. This mode is good for visualizing geometry clearly.
 The second option lets you choose the render view for the active viewport. By default the perspective, top, left, and back views are shown. If you want you can set different views for each viewport.
 If you ever want to reset the position and orientation of the camera, you can do this easily by selecting the Reset menu item in the popup menu. This will set the camera back to its default position in the active viewport.
Grid Settings
By default you will see a gray shaded grid in all viewports. The grid is very useful for placing models in your scene or when you create new level geometry. We will go in to more detail about this when we learn about CSG brushes. The color of the gridlines can be adjusted in the Options dialog. The size of the grid can be changed for all four viewports. Let’s change the size of the grid in the perspective viewport. Left-click inside the perspective viewport to activate it. We can use the [ and ] keys to increase and decrease the size of the grid. You can see the scale of the viewports at the bottom of the editor, in the main window's status bar.
 Now right-click in the perspective viewport. The popup menu appears. In the popup menu you can see the two options to increase and decrease the grid size. Alternatively you can also go to the View menu in the main menu and click on the Increase Grid Size or Decrease Grid Size menu items there.
Quick Render
Let’s render a screenshot of one of the viewports. We can do this by right-clicking in the viewport so that the popup menu appears. Do this in the perspective viewport. Select the ‘Quick render' menu item to render a screenshot of the viewport. A screenshot is rendered and saved in the "Documents\Leadwerks\Screenshots" folder on your computer.
Conclusion
This concludes the lesson on the Leadwerks Editor interface and basic features. At this point you should be able to fly around the scene with ease and adjust basic view settings. You will learn about the editor features in more detail in following lessons. Select the "Tutorial Samples" template, enter a name for your project like "Tutorials", and press the OK button to create your new project. Make sure the new tutorials project is selected in the projects list, then press the OK button to load this project and begin the lessons.

 We can also switch to a single viewport. By clicking with the left mouse button in one the viewports, we make it the active viewport. You can switch from four to one viewports by selecting the View > Single Viewport menu item. Selecting the same button again switches back to four viewports. The option to switch between single and four viewports can also be activated with a shortcut: F12.
 We can also drag the dividers in between the viewports to adjust their size.

 Here we see the following values that can be adjusted.
 Let's try out some of the options. The first option lets you select the render mode. By default the perspective viewport has the option "Textured + lighting" selected, while the other viewports have "Wireframe" selected. Try changing the render mode for the perspective viewport to solid. You will now see the scene without any textures or shadows visible. This mode is good for visualizing geometry clearly.
 The second option lets you choose the render view for the active viewport. By default the perspective, top, left, and back views are shown. If you want you can set different views for each viewport.
 If you ever want to reset the position and orientation of the camera, you can do this easily by selecting the Reset menu item in the popup menu. This will set the camera back to its default position in the active viewport.
 The size of the grid can be changed for all four viewports. Let’s change the size of the grid in the perspective viewport. Left-click inside the perspective viewport to activate it. We can use the [ and ] keys to increase and decrease the size of the grid. You can see the scale of the viewports at the bottom of the editor, in the main window's status bar.
 Now right-click in the perspective viewport. The popup menu appears. In the popup menu you can see the two options to increase and decrease the grid size. Alternatively you can also go to the View menu in the main menu and click on the Increase Grid Size or Decrease Grid Size menu items there.