Materials
Creating Materials
We are going create some materials from scratch so we can learn common techniques and best practices when it comes to creating materials.. First, download this zip file. Create a new subfolder in the "Materials" directory called "TutorialMaterials".Extract all textures from the zip file into this folder. You'll see new thumbnails appear in the editor as the image files are converted and imported as textures.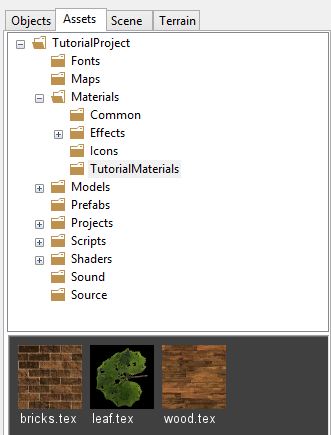
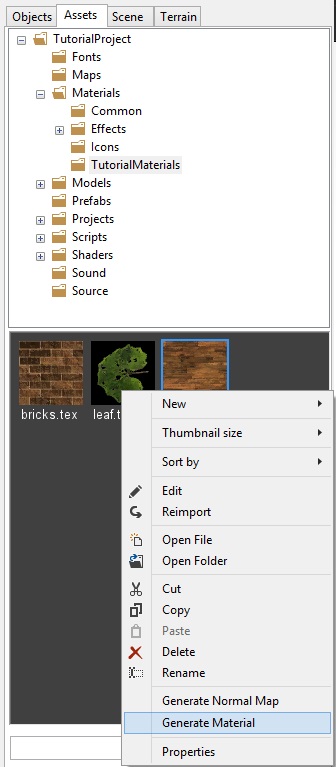
To create a material, right click on the "Wood" texture and select the Generate Material popup menu item. This creates a new material file with the same name as the texture and the "mat" file extension. You'll now see a thumbnail of a sphere covered with your wood texture.
You can imagine that if you import a lot of textures, it might be a tedious process to create all the materials one at a time. Fortunately we can create lots of materials in a batch at once. To create materials for the remaining textures, select the ‘TutorialMaterials’ folder. Now go to the main menu and select the Tools > Batch Generate Materials menu item.
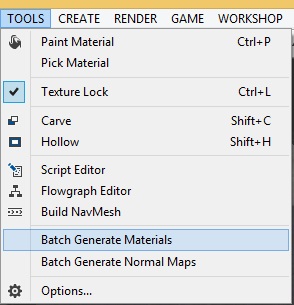
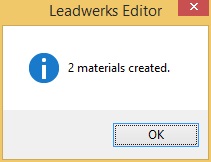
This will generate materials for all textures present in the selected folder. Once the process is complete, you will see a message box indicating how many materials were generated.
Material Editor
Double-click on the wood material that we just created to open it in the material editor. The material editor allows you to adjust all properties of a material and see the results in real time.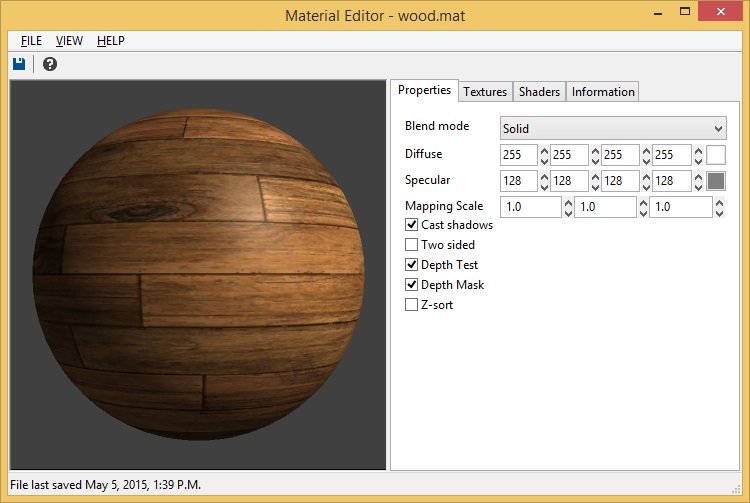
In the preview panel you can see a sphere with the wood material applied. Depending on the material you are making you might want to use a different shape to display the material. If you select the View > Teapot menu item you can change the displayed model to a classic teapot.
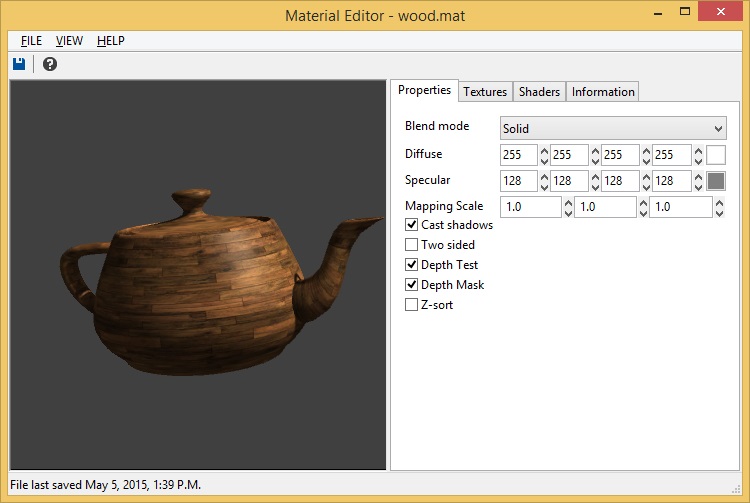
The material editor has a panel on the right side with four tabs called Properties, Textures, Shaders, and Information. Let's go through these items and learn what they each do.
Properties
The properties panel displays different properties that affect the appearance of a material.- Blend mode: The blend mode controls how a rendered surface is combined with any underlying surfaces that have already been rendered at each pixel. The default mode is "solid" meaning that the new surface simply overwrites whatever was there previously. There are other blend modes that can be used to create a variety of effects. If a blend mode other than solid is used, then z-sorting will typically be enabled, and depth mask disabled.
- Alpha blending will blend the surface in based on the alpha value of the diffuse texture (times the material alpha value). This can be used for transparency.
- Shade blending darkens the underlying surface. This is done by multiplying the old color value by the new one. This can be used for dark smoke or shadow effects.
- Light blending will add the new value to the old value, lightening the surface. This is used for glowing effects like coronas or lasers.
- Mod2X will multiple the old value by the new one, then multiply by two. This can be used for an effect that both darkens and lightens the underlying surface.
- Invisible is a special mode that skips rendering of the new surface altogether. It is used for objects you want to be pickable in the scene, but completely see-through.
- Diffuse: The diffuse color is the color the material appears, independent from viewing angle and lighting conditions.
- Specular: The specular color indicates the "shininess" of a material. The brighter the color, the more reflective the material will appear.
- Mapping scale: The mapping scale controls the way a material is automatically mapped across the face of a brush. This is a multiplier that can be used to make materials appear bigger or smaller on a surface by default, so that additional adjustments are not needed.
- Cast shadows: When checked, the material will cast a shadow (if the object it's applied to has shadows enabled).
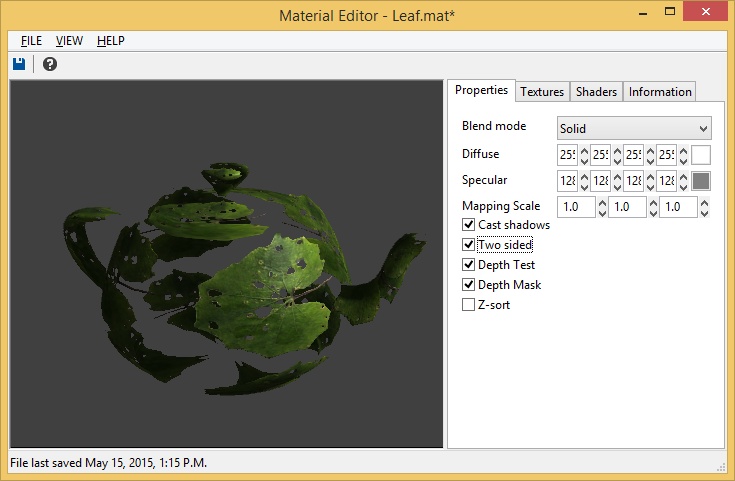
- Two sided: The material is rendered on two sides. Use this options for foliage likes tree leaves or grass.
- Depth test: When depth testing is enabled (the default setting), the renderer will check the z buffer to see if the current pixel has already been rendered to with a surface that is closer to the camera. If it has, then that pixel will be skipped. If depth testing is disabled, the surface this material is applied to will be drawn on top of whatever is already in the depth buffer, regardless of distance from camera. You can disable depth testing and enable z-sorting to make surfaces appear on top of everything else in the scene. This is used for some special effects like light coronas.
- Depth mask: When depth masking is enabled, the rendered surface's depth value for each pixel is recorded in the depth buffer, and will occlude other surfaces that appear behind that pixel. Normally this is enabled, but it may be disabled for some special effects.
- Z-sort: Z-sorting is used to render a surface after everything else in the scene has been drawn. Z-sorted surfaces are sorted by distance from the camera, back to front. When combined with blending this can be used to achieve some special effects like light beams and transparent surfaces.
Just like with the texture editor you can zoom in and out by holding down the right mouse button and by dragging the mouse up and forth. Rotating the teapot (or the preview shape you have chosen) can be done by holding down the left mouse button in the preview panel and moving the mouse around. You can also change the position of the light by holding down the right mouse button (mouse wheel) and moving the mouse around.
Textures
The textures panel contains a list of textures the material uses. Some materials may only use a single texture, but most will use several. The first four slots are named "Diffuse", "Normal", "Specular", and "Displacement", as these are the most common uses for these texture units. However, different shaders won't always use the same four textures. This is just a hint for convenience.Shaders
The shaders panel has two properties for shaders. Each material can use two different shaders. The first is used when an object is rendered by the visible camera. The shadow shader is used when a shadow is rendered from the point of view of a light. Shadow shaders only need to draw geometry, and don't usually need to look up textures. By using a simpler shader for shadow rendering we make the game run faster, since it is more efficient.Information
The information panel displays information about the file name and location.Normal Maps
We'll use the brick material to demonstrate normal maps. Our brick material only displays a diffuse texture, which makes it look quite flat when applied to a surface. We can add a normal map to make the material appear bumpier and more realistic. To do this, right-click on the brick texture and select the Generate Normal Map popup menu item.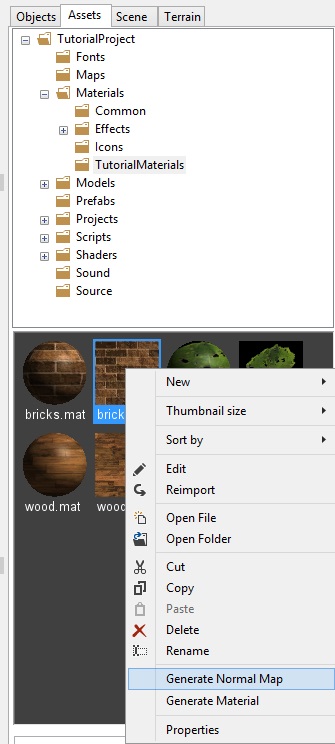
This will create a normal map from the diffuse texture. The normal map file name will be the same as the diffuse texture, with the suffix "_dot3" added at the end. This funny-looking purple texture uses pixel colors to indicate the direction each pixel faces along the surface.
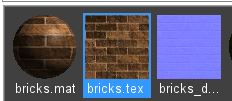
Now that we have a normal map, let's delete our material and create a new one. Right-click on the wood material and select the Delete popup menu item to get rid of it. Then right-click on it again and select the Generate Material popup menu. The editor will detect the presence of the normal map, and include it in the new material. In the material editor, change the preview shape to a sphere by selecting the View > Sphere menu item in the material editor menu. The difference is subtle, but if you rotate the shape around you'll see the light reacts differently on each pixel.
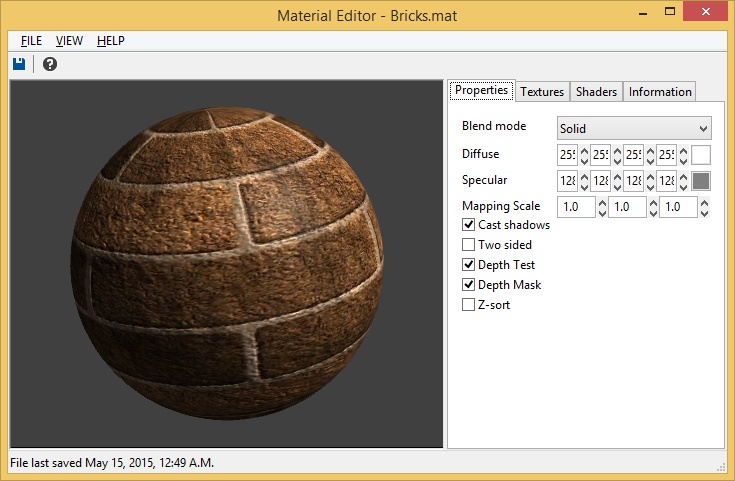
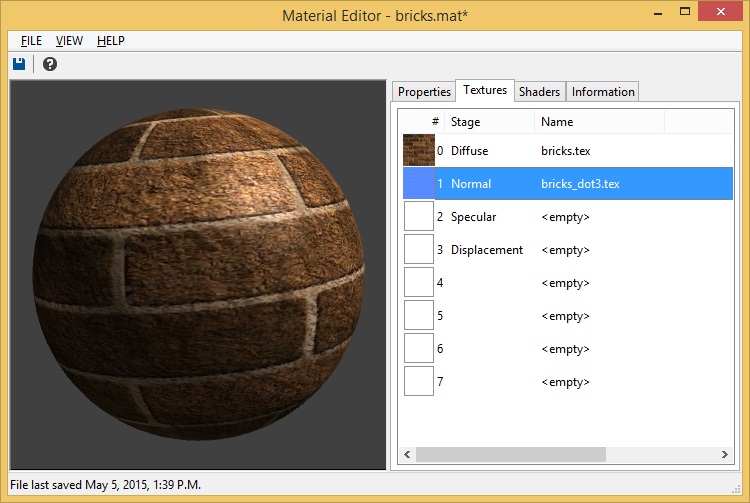
Let's take a look at how this material is different from the first one. Select the Textures tab to look at the textures assigned to this material. The normal map will appear in the second texture slot.
Now select the Shaders tab. Before, the shader our material used was called "diffuse.shader". Our new material has automatically select the shader "diffuse+normal.shader". This shader will render the diffuse texture with a normal map.
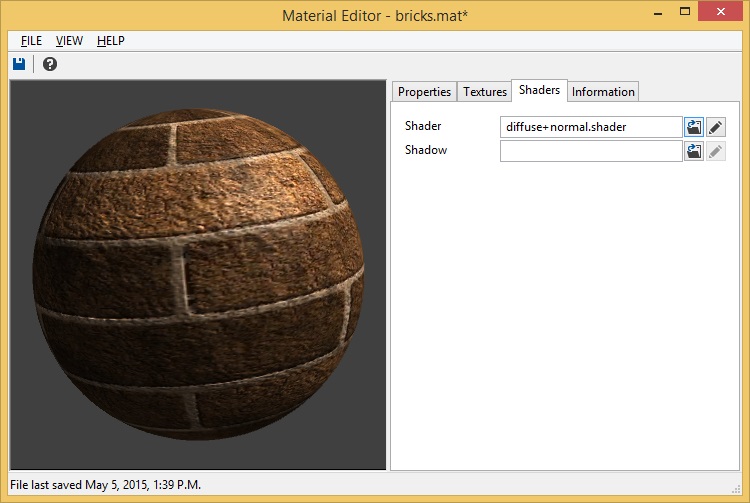
We could also have created this material by adding the normal map in the second texture slot and changing the shader to "diffuse+normal.shader".Our brick material so far doesn't look dramatically different from the original material with just a plain diffuse texture. There is a way we can make the normal mapping effect more pronounced. Double-click on the brick normal map texture to open it in the texture editor.
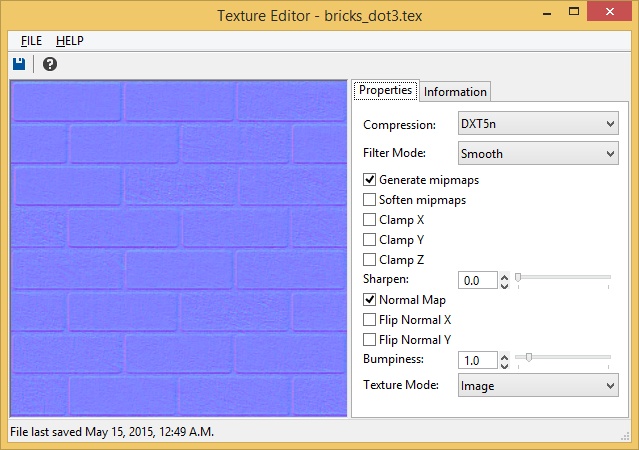
The Bumpiness property can be used to effect the strength of the normal mapping effect. Increase this to 3.0 and then select the File > Save menu item in the texture editor menu. The normal map will suddenly appear to have a lot more small details visible.

If you look at the brick material now, you'll see the normal mapping effect is very pronounced.
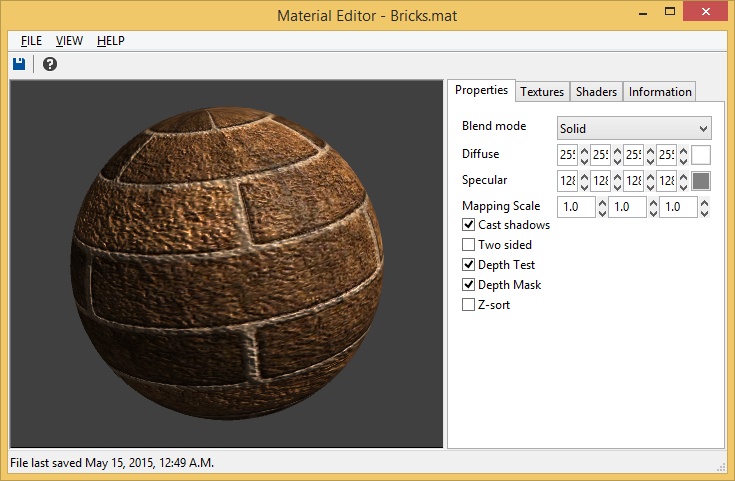
Look carefully at the image above. Does something seem wrong? The bricks actually look like they are sinking into the mortar, when they should be coming out of it. This is because of the way normal maps are generated. The algorithm assumes that bright areas project off the surface further, and dark areas are recessed, but this isn't always what we want. Fortunately, we can fix this by opening up the normal map texture and checking the Flip Normal X and Flip Normal Y checkboxes. Do this and then save the texture.

When we look at the brick material again, the bricks appear to be coming out of the surface, while the mortar between them seems to sit further back.

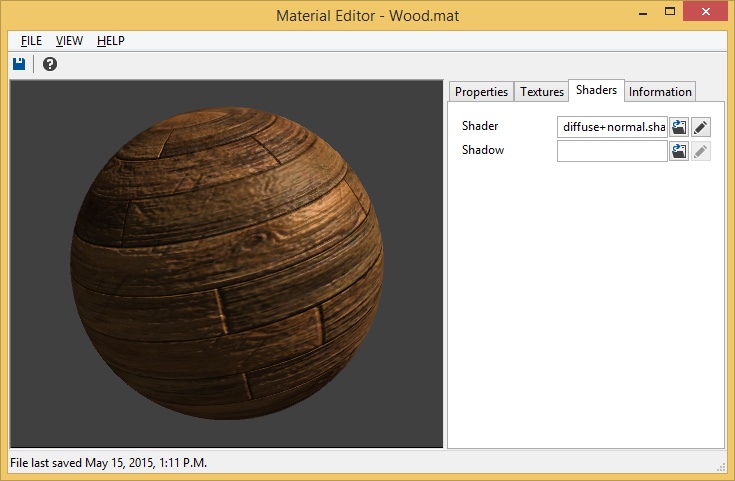
Now go ahead and make a normal mapped material for the wood texture. I used a value of 4.0 for the normal map bumpiness. When you're done, it should look like this.
Custom Shaders
Now we're going to create a special material for the leaf texture. First, let's change the compression mode the leaf texture uses so we can retain the image's alpha channel. We'll use the DXT3 compression mode since we only need a simple on/off alpha channel.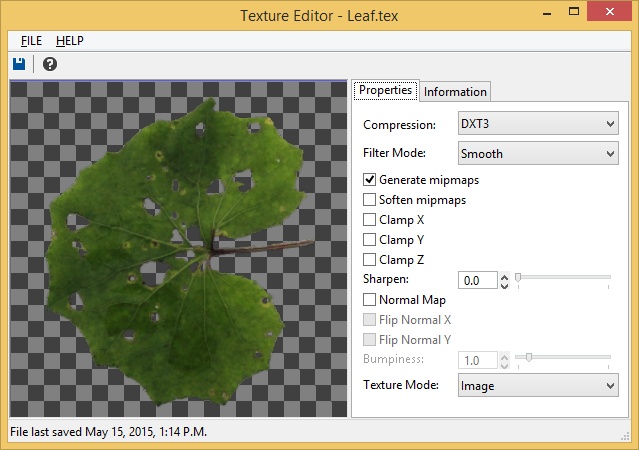
Now create a regular old normal-mapped material like we did earlier. if you need help remembering what to do, just go back and look at how we created the brick material.Once your leaf material is created, open it in the material editor and switch the preview shape back to a teapot.
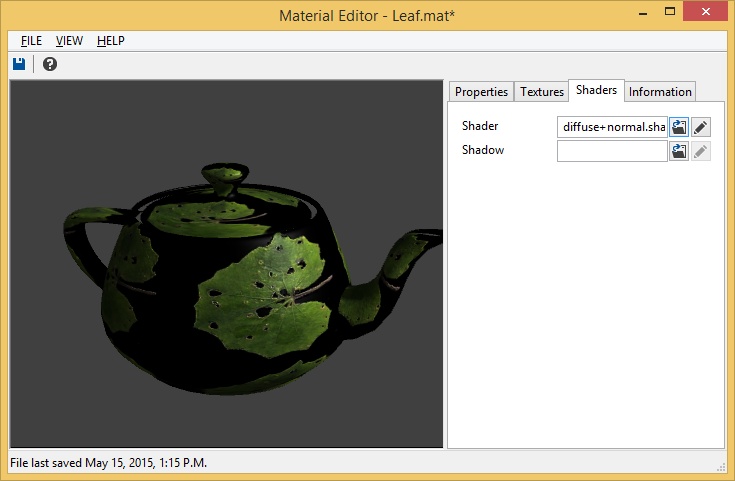
Now comes the fun. We're going to use a custom shader to make this material appear differently than a regular material. Select the Shaders tab. Press the Select File button and choose the file "diffuse+normal+alphamask.shader", then press the OK button. This will choose a shader that discards pixels based on their alpha value, making parts of the material see-through.
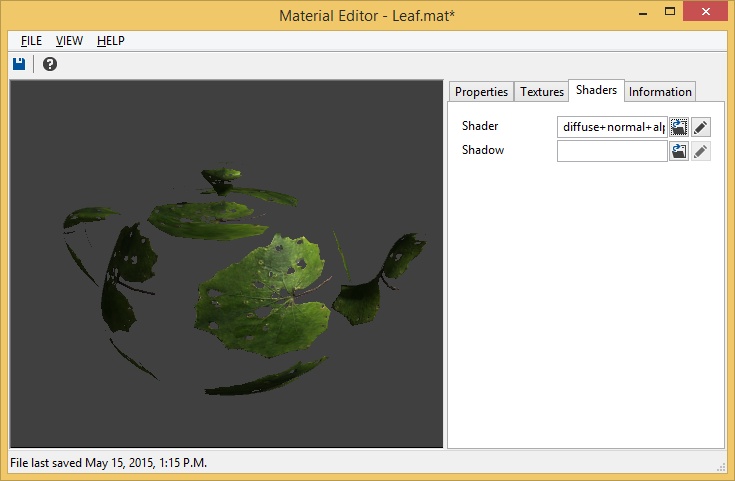
This is pretty cool, but we can make the material look even better by checking the "Two sided" checkbox under the Properties tab. This will make it so we can see the faces of the teapot that are pointng away from the camera. Now that is looking good!
There's one more thing we should change to make our material perfect. If we were to use this material in a map right now, the surface it was applied to would have transparent parts, but it would still cast a completely solid shadow. In order to add alpha discard transparency to the shadow, we need to assign a special shadow shader to the material. We can do this by going back to the Shaders panel and pressing the Select File button next to the Shadow shader property. Navigate to find the file "Shaders\Model\Shadow\shadow+alphamask.shader" and press the OK button to assign this shadow shader to the material.
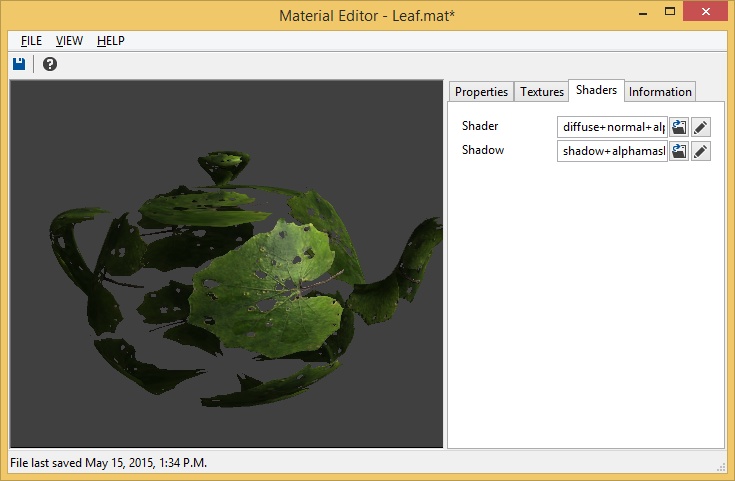
Select the File > Save menu item in the material editor menu and your leaf material is complete. All foliage materials you use can be created with these same settings. Most of the time the default materials Leadwerks generates for you will work without any adjustment, but when you are cooking up something special, there are enough options to allow you to get any effect you want.
Painting Objects
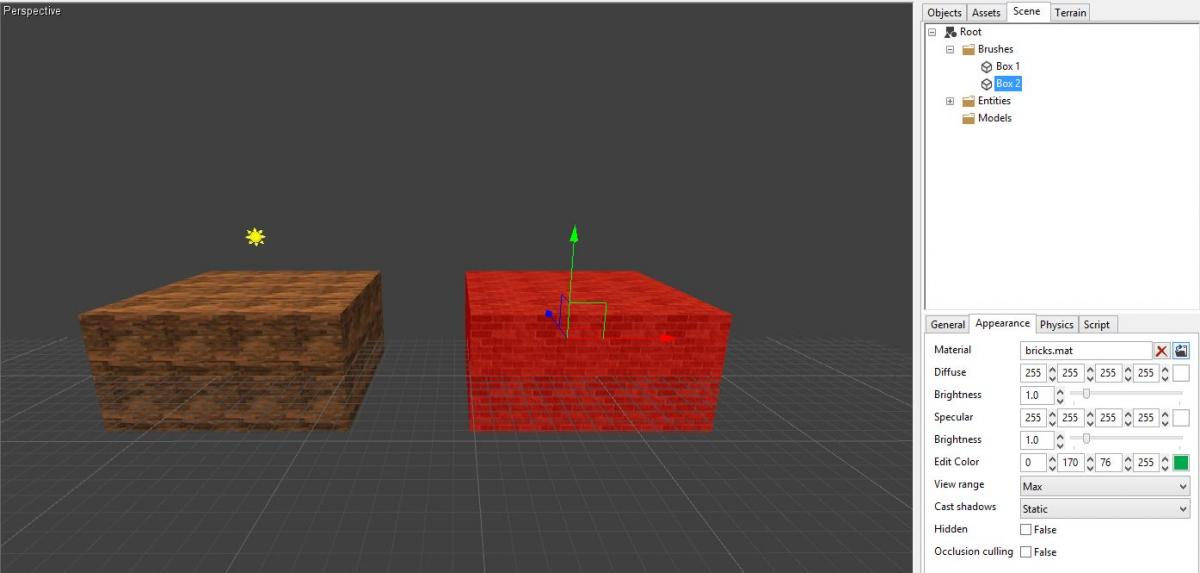
We have created some nice looking materials, so now let's use them in our map. Select the brick material we created in the asset browser, then draw a new box brush on top of the floor in the map. The newly created brush will automatically use the selected material. Whenever you create a new brush, they will use the currently selected material. if another type of file is selected in the asset browser, then the brush will just use whatever material was used the last time a brush was created.Now let's apply the wood material to the box that you just created. There are a few different ways to do this. The first method click on the material thumbnail in the asset browser, drag it over to the perspective viewport, and release the mouse while over the brush you want to apply the material to.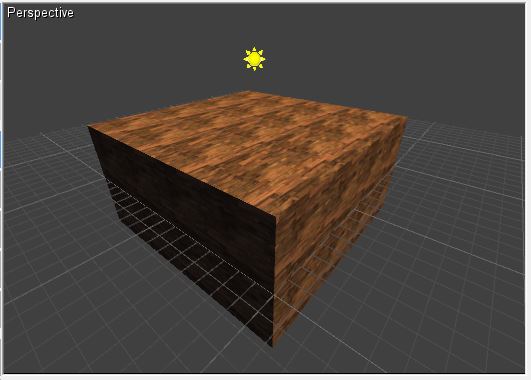
Another way to apply materials is to edit the material property in the properties panel, under the Scene tab.One last way to do this is to select a brush, select a material file in the asset browser, and then select the Tools > Paint Material menu item in the main menu.
Painting Brush Faces
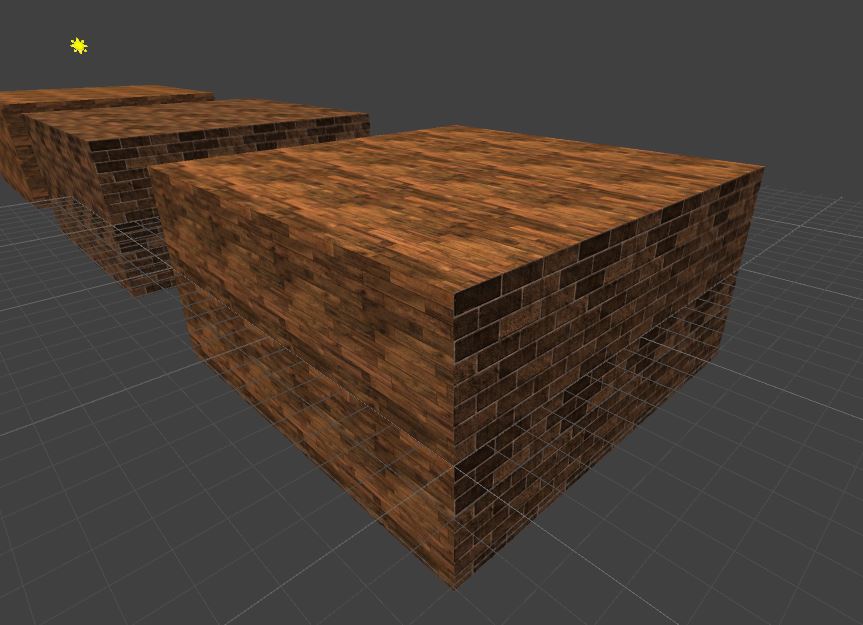
In the object bar on the left side of the main window we can also find the "Select Face" button. When this is pushed, face selection mode will be enabled, allowing us to select individual faces of a brush. This can be used to apply materials to individual faces.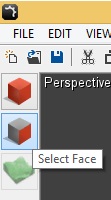
Create another box brush. When you have created the box, the last used material is directly applied, which in this case is the brick material. If this is not the case, go ahead and apply the brick material to the brush now.
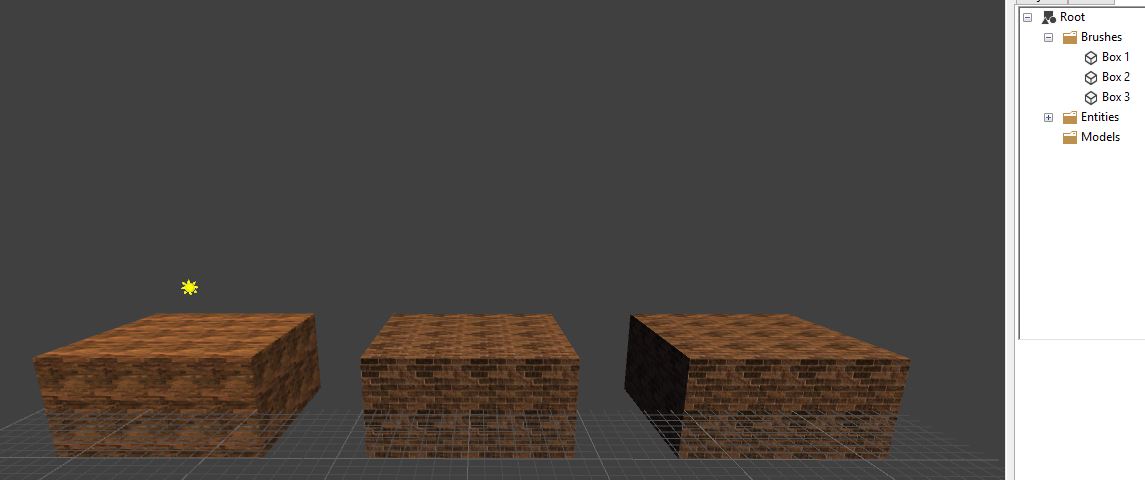
Now push the "Select Face" button in the object bar to switch to face selection mode. Select two faces on the new brush. To select multiple faces, hold down the Control key while clicking on a face.
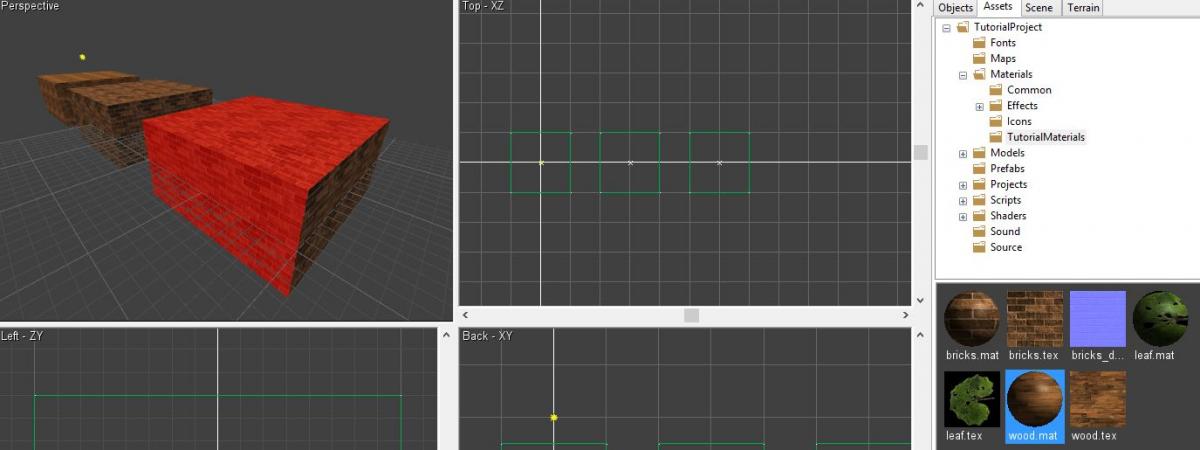
Now go to the "Materials" folder in the asset browser and look for the "Wood" material. Drag the material onto one of the selected faces. The material will be applied to all currently selected faces.
Texture Mapping
When face selection mode is active, we can adjust the way textures are displayed on each brush face. The objects panel will display some new options that weren't visible before. The texture mapping properties allow you to scale, move and rotate textures by changing the texture mapping coordinates.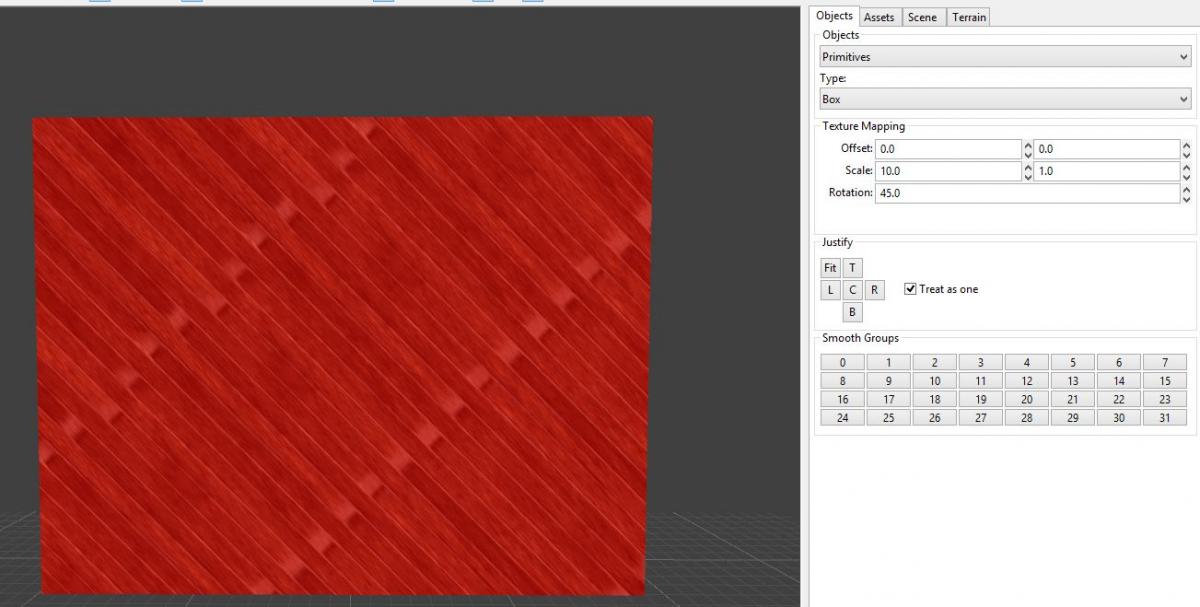
Justify
The justify buttons are very useful for aligning textures to the edge of an object. The screenshot below show how a face is using a texture that is not properly aligned.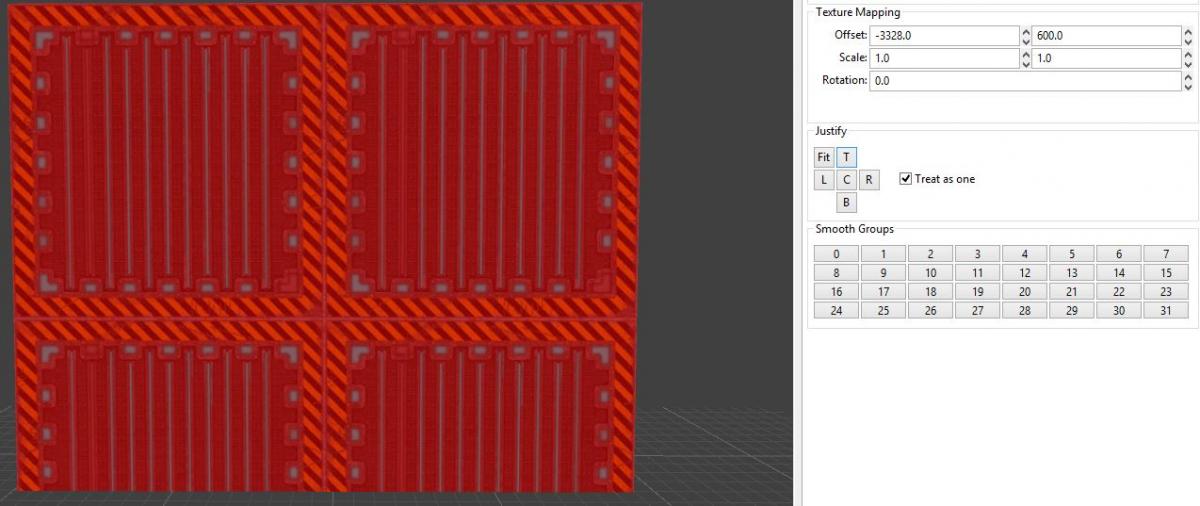
We can press 'Fit' to make sure that the texture is spread across the face, covering it completely. The other buttons align the texture to the Top, Left, Right, Center or Bottom of the face. When you have multiple faces selected, and you have the 'Treat as one' option selected, then the selected faces are treated as if they are all one big surface.
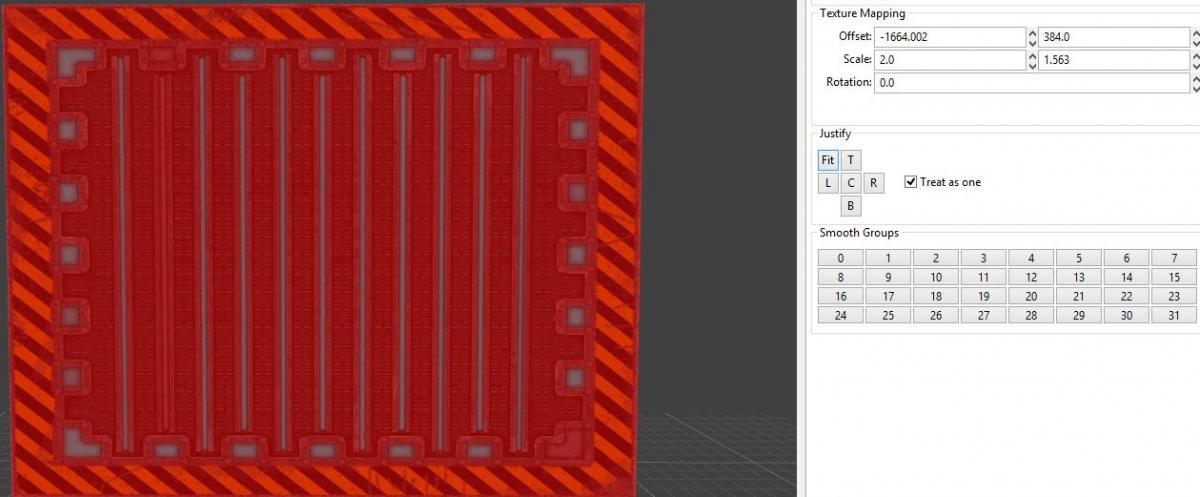
Most of the time you don't even need to worry about texture mapping, and when you do, it only takes a few clicks to get the look you want. This is one of the reasons constructive solid geometry is so great for building game levels.