Experiments with Intel Embree Raytracing
I've added an implementation of Intel's Embree raytracing library. The first step is to just expose a simple low-level library for use with C++. I have many ideas that can be built off this core functionality. Being able to trace millions of rays per second could be used to calculate ambient occlusion, some form of dynamic global illumination, or just batched asynchronous raycasts.
As with all highly optimized code, the ray tracing commands are not quite as user-friendly as the rest of our API, but I will walk you through the steps to setting up a simple ray tracing test.
Getting Started
The first step is to create a ray trace device and a ray tracing scene:
// Create raytrace device
auto rt = CreateRayTracer();

// Create RT scene
auto scene = CreateRTScene(rt);
A ray tracing scene is different from a Leadwerks Scene object. You can add mesh data directly to a scene:
//Create the scene ground
auto ground = CreateBox(NULL, 10, 0.2, 10);
auto rtground = scene->AddMesh(ground->GetMesh(0));
Instanced Geometry
Ray tracing scenes do not have any concept of entities like Leadwerks does. Any mesh you add to a scene just uses the mesh vertex positions without any transformation. However, you can make an instance of a scene, add it as a child of another scene, and apply a transform matrix to adjust its position and orientation.
Let's make a scene just to act as a container for a mesh we plan on making multiple instances of:
// Create RT scene that will be used as a container for the box mesh
auto meshcontainer = CreateRTScene(rt);

//Create a box mesh and add it to the container scene
auto box = CreateBox(NULL);
auto rtmesh = meshcontainer->AddMesh(box->GetMesh(0));
And now let's create an instance of the mesh container scene in the first scene we created:
// Create instances of the box scene and add them to the parent scene
auto A = CreateRTInstance(scene, meshcontainer);
We can now reposition instance A like so. We'll move it one meter to the left, and up 0.1 meters (half the ground height) plus 0.5 (half the box height):
A->SetPosition(-1, 0.6, 0);
Now let's create a second instance and move it one meter to the right:
// Create a second instance
auto B = CreateRTInstance(scene, meshcontainer);
B->SetPosition(1, 0.6, 0);
Tracing Rays
Now we have a scene with ground and two boxes, and we are ready to trace rays. Our ray tracing code is hyperoptimized, which means we need to feed it data in the exact format it wants. Instead of providing two points for the raycast, we are going to provide a starting point, a normalized direction vector, and a length for the direction vector.
// Define a ray
RTRay ray;
ray.origin = Vec3(-10, 0.6, 0);
ray.dir = Vec3(1, 0, 0);
ray.length = 20.0f;

// Perform single ray trace
auto rayinfo = scene->TraceRay(ray);
The returned rayinfo structure will give us information about the ray. The structure uses IDs to tell us what was hit.
- If the mesh ID equals RT_INVALID_ID then nothing was hit, otherwise something was hit.
- If the instance ID equals RT_INVALID_ID, then a mesh added directly to the scene was hit, and we can find it by the mesh ID.
- If the instance ID it not RT_INVALID_ID, then an instance of another scene that was added to this scene was hit.
- Note that RT_INVALID_GEOMETRY_ID does not equal zero, so a mesh ID of 0 indicates a valid mesh.
// Print out the ray hit information
if (rttrace.meshid == RT_INVALID_ID)
{
    Print("Ray missed");
}
else
{
    Print("Hit position: " + std::wstring(rttrace.position));
    if (rttrace.instid != RT_INVALID_ID)
    {
        if (rttrace.instid == A->id) Print("A hit (" + String(rttrace.instid) + ")");
        if (rttrace.instid == B->id) Print("B hit (" + String(rttrace.instid) + ")");
    }
    else
    {
        if (rttrace.meshid == rtground->id) Print("Ground hit (" + String(rtground->id) + ")");
    }
}
This is more complicated than the simpler Leadwerks raycasting commands, but this approach will also scale better when performing hundreds of thousands of raycasts.
Here is the complete code for the ray trace test program:
#include "Leadwerks.h"

using namespace UltraEngine;

int main(int argc, const char* argv[])
{
    // Create raytrace device
    auto rt = CreateRayTracer();

    // Create RT scene
    auto scene = CreateRTScene(rt);

    //Create the scene ground
    auto ground = CreateBox(NULL, 10, 0.2, 10);
    auto rtground = scene->AddMesh(ground->GetMesh(0));

    // Create RT scene that will be used as a container for the box mesh
    auto meshcontainer = CreateRTScene(rt);

    //Create a box mesh and add it to the container scene
    auto box = CreateBox(NULL);
    auto rtmesh = meshcontainer->AddMesh(box->GetMesh(0));

    // Create instances of the box scene and add them to the parent scene
    auto A = CreateRTInstance(scene, meshcontainer);
    A->SetPosition(-1, 0.6, 0);

    // Create a second instance
    auto B = CreateRTInstance(scene, meshcontainer);
    B->SetPosition(1, 0.6, 0);

    // Define a ray
    RTRay ray;
    ray.origin = Vec3(-10, 0.6, 0);
    ray.dir = Vec3(1, 0, 0);
    ray.length = 20.0f;

    // Perform single ray trace
    auto rttrace = scene->TraceRay(ray);

    // Print out the ray hit information
    if (rttrace.meshid == RT_INVALID_ID)
    {
        Print("Ray missed");
    }
    else
    {
        Print("Hit position: " + std::wstring(rttrace.position));
        if (rttrace.instid != RT_INVALID_ID)
        {
            if (rttrace.instid == A->id) Print("A hit (" + String(rttrace.instid) + ")");
            if (rttrace.instid == B->id) Print("B hit (" + String(rttrace.instid) + ")");
        }
        else
        {
            if (rttrace.meshid == rtground->id) Print("Ground hit (" + String(rtground->id) + ")");
        }
    }

    return 0;
}
The program will output this text when run, indicating that instance A is the first hit object, along with the position the intersection occurs at.
Hit position: -1.5, 0.6, 0
A hit (1)
Ray Filtering
You can use the instance and mesh filter feature to make a ray that only intersects some geometry. Here we will set a bitwise mask so that instance A gets skipped, and instance B will be hit. Just add this code right before the scene->TraceRay() call.
// Assign obect masks
A->SetMask(1);
B->SetMask(2);
And then set an additional parameter in the TraceRay call to define the mask:
// Perform single ray trace
auto rttrace = scene->TraceRay(ray, 2);
Filtering will work on both a per-instance and per-mesh level. The default mask value for instances is 1 and the default mask value for raytrace meshes is -1u (all flags).
The output of our modified program shows that instance A is being ignored, and now instance B is the one that gets hit:
Hit position: 0.499999, 0.6, 0
B hit (2)
Advanced Usage
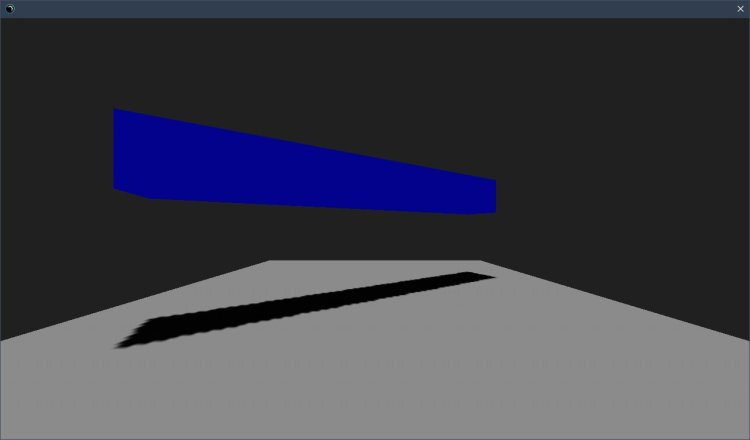
The code below demonstrates a very simple real-time lightmapper using the ray tracing system.
#include "Leadwerks.h"

using namespace UltraEngine;

int main(int argc, const char* argv[])
{
    auto displays = GetDisplays();
    auto win = CreateWindow("", 0, 0, 1280, 720, displays[0]);
    auto fb = CreateFramebuffer(win);
    auto world = CreateWorld();
    auto cam = CreateCamera(world);
    cam->SetClearColor(0.125f);

    auto ground = CreateBox(world, 10, 1, 10);
    auto mtl = CreateMaterial();
    ground->SetMaterial(mtl);

    int sz = 128;
    auto pixmap = CreatePixmap(sz, sz);
    auto tex = CreateTexture(TEXTURE_2D, sz, sz);
    mtl->SetTexture(tex);

    auto caster = CreateBox(world, 8, 1, 1);
    caster->SetPosition(0, 3, 0);
    caster->SetColor(0, 0, 1);

    cam->SetPosition(0, 2, -5);

    auto rt = CreateRayTracer();
    auto rts = CreateRTScene(rt);
    auto base = CreateRTScene(rt);
    auto rtm = base->AddMesh(caster->GetMesh(0));
    auto rti = CreateRTInstance(rts, base);

    RTRay ray;
    ray.dir = Vec3(0, 1, 0);
    ray.length = 20;

    while (not win->KeyHit(KEY_ESCAPE) and not win->Closed())
    {
        caster->Turn(0, 1, 0);
        rti->SetMatrix(caster->matrix);
        unsigned int color;

        for (int x = 0; x < sz; ++x)
        {
            for (int y = 0; y < sz; ++y)
            {
                ray.origin.x = (float(x) / float(sz) + 0.5f / float(sz)) * 10.0f - 5.0f;
                ray.origin.y = 0.5f;
                ray.origin.z = -((float(y) / float(sz) + 0.5f / float(sz)) * 10.0f - 5.0f);

                auto rayinfo = rts->TraceRay(ray);
                if (rayinfo.meshid != RT_INVALID_ID)
                {
                    color = Rgba(0, 0, 0, 255);
                }
                else
                {
                    color = Rgba(255, 255, 255, 255);
                }
                pixmap->WritePixel(x, y, color);
            }
        }
        tex->SetPixels(pixmap);

        world->Update();
        world->Render(fb);
    }
    return 0;
}
There's a lot that could be done to improve this basic implementation, but the idea works nicely.
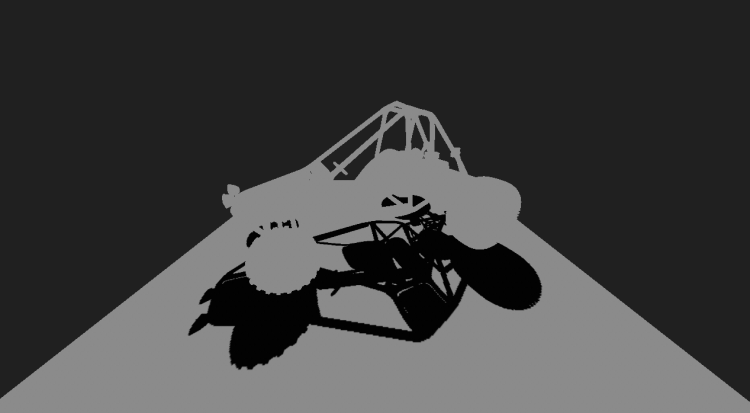
Substituting the spinning box a more complex model, we can see the routine does not seem to be bothered much by mesh complexity. This model is over 100,000 polygons, and a 512x512 lightmap is updating in 30 milliseconds with one CPU core and unbatched raycasts.
Here it is in motion:
Here is an updated test using shadow maps for direct lighting and CPU ray tracing for ambient occlusion:
-
 3
3

 SCP
SCP


2 Comments
Recommended Comments